Materials:
-For moose, I used the first time “Bamboo weed “, the second time” Nubuck “, yarn consumption from me it turned out a small, somewhere 1 \ 4 hank “bamboo weed “and nubuck took a little bit.
-Horns and hooves are tied from velor, it is necessary just a little, you can take a similar yarn the main characteristics, just brown colors.
-For a sweater, I used a child’s yarn new, “I really liked the cherry blossom. But you can use any yarn, sew clothes or don’t wear it at all.
– Wire for horns, and wire for the frame (arms and legs will be tied into the body if knitted from the yarn that holds the shape (the same bamboo weed) then the frame can not be used.
– Half beads, a drop of white felt, and at all a bit of suede eye cord, or Use ready-made plastic eyes as you see fit.
– Pastel for tinting or shade or can dispense with tinting at all.
– Decorations to your taste.

Legend
Sc = single crochet
Dc = double crochet
İnc = increase (knit two from one loop)
Dec = decrease (knit two loops together)
Ch = air loop
Use a marker to determine the beginning of a row; if the marker is shifted, use a loop displacement, adjust its position by knitting or not tying the necessary amount single crochet: These stitches do not count in the next row stitches.
Handles and legs
Arms:
Brown yarn (I have velor) or extra yarn from you
1r. – 2 Ch in the second 6 Sc or 6 Sc in the amigurumi ring
2 p. – (2Sc İnc). * 2 = 8 Sc
3 – 4r. = 8 Sc go to the main yarn, I have a beige nubuck beige yarn
5 – 15r. = 8 Sc, break the thread, we will knit the handles, if we don’t sew, we don’t need it.
Legs:
Brown yarn (I have velor) or extra yarn from you
1r. – 2 Ch in the second 6 Sc or 6 Sc in the amigurumi ring
2 p. – (1Sc 1 İnc.) * 3 = 9 Sc
3 pp. – behind the back wall of the loop (the one further from us) = 9 Sc
4 pp. = 9 Sc
5p.-1 Dec, 7Sc = 8Sc go to the main yarn, I have a beige nubuck beige yarn
6 – 15r. = 8 Sc, break the thread, we will knit the legs, if we don’t sew, we don’t need it.
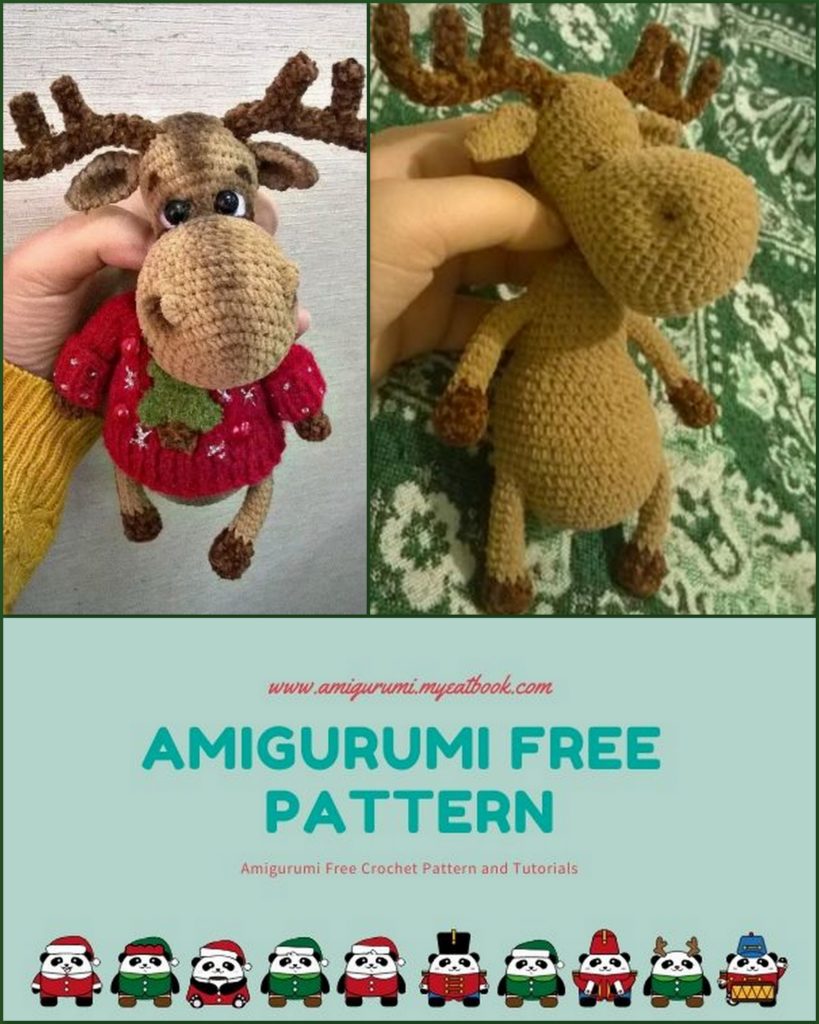
We stuff as we knit, I only stuffed the hooves, then I inserted the wire of the frame and stuffing
I didn’t need. I put coins in the legs – 1 kopeck, just for the form, but you can do without it .
Body:
The marker passes strictly in the middle of the back, please follow the marker, here we are very
it is important to knit arms and legs symmetrically. At this point we need a wire to
the frame, since I knitted from nubuck, this yarn itself is thin and does not hold its shape very well well, such a chenille wire came in handy for me (see photo). You can use any isolate the ends with adhesive tape, you can isolate the whole frame with it. I’ll write right away that I’m not very willingly took on those products where you needed wire, was afraid not to cope, but you try, it’s only until you take it scared, your eyes are afraid, but your hands do!
1r. – 2 Ch – in the second 6 Sc (or 6 Sc in the amigurumi ring)
2 p. – 6 İnc. = 12 Sc
3 p. – (1Sc, İnc) * 6 = 18 Sc
4 p. – (2 Sc, İnc) * 6 = 24 Sc
5 p. – (3 Sc, İnc) * 6 = 30 Sc
6-7r.-30Sc
8 p. – (4Sc İnc) * 6 = 36 Sc
9 p. – in this row we will knit the legs, just attach the legs to the body and knit the specified
the number of columns without a crochet, capturing at the same time the loop of the body and legs
7Sc sweating-4 Sc of the body with the foot- 14 Sc over the body – 4 Sc then the body with the foot-7 Sc over the body = 36
10 p. – finish knitting the legs, knit along the body and along the unreached edge of the legs
– 7Sc sweating-4 Sc of the body with a leg- 14 Sc over the body – 4 Sc then the body with a leg-7 Sc over the body = 36
11 p. – (5Sc İnc.) * 6 = 42 Sc
12r-13r. = 42 Sc
14 – 16Sc, 5 Dec. , 16Sc. = 37 Sc
15 p. -17 Sc, 1 Dec, 18 Sc. = 36 Sc
16 – 17r. = 36 Sc
18p- (4Sc, Dec) * 3 (Dec, 4 Sc) * 3 = 30 Sc
19 p. – (3Sc, Dec) * 6. = 24 Sc
20p-24p = 24Sc
25 R.-knit handles, the principle is the same as for the legs
4Sc over body-4 Sc. bodies with a handle- 8 Sc by body- 4 Sc. body with a handle – 4 over the body = 24
26 finish the knit
4Sc over body-4 Sc. bodies with a handle- 8 Sc by body- 4 Sc. body with a handle – 4 over the body = 24
At this point, I inserted the frame into the body. Measured the length of the handles + 5cm (for screwing to the body,
insulated the end, screwed it to the body frame. There were 2 pieces of such. Insert frames into
body, BEAT, we stuff tightly, but not to a stone state, so that the filler does not
shone through between the loops. After row 29, I twisted the frames together, and the remaining
she brought the wire to her neck and stuck it in her head to hold it.
27r – 29r = 24 Sc
30p- (2Sc, Dec) * 6 = 18Sc
31p- (1Sc, Dec) * 6 = 12Sc
32p- (2Sc, Dec) * 3 = 9Sc
33r-36r = 9Sc
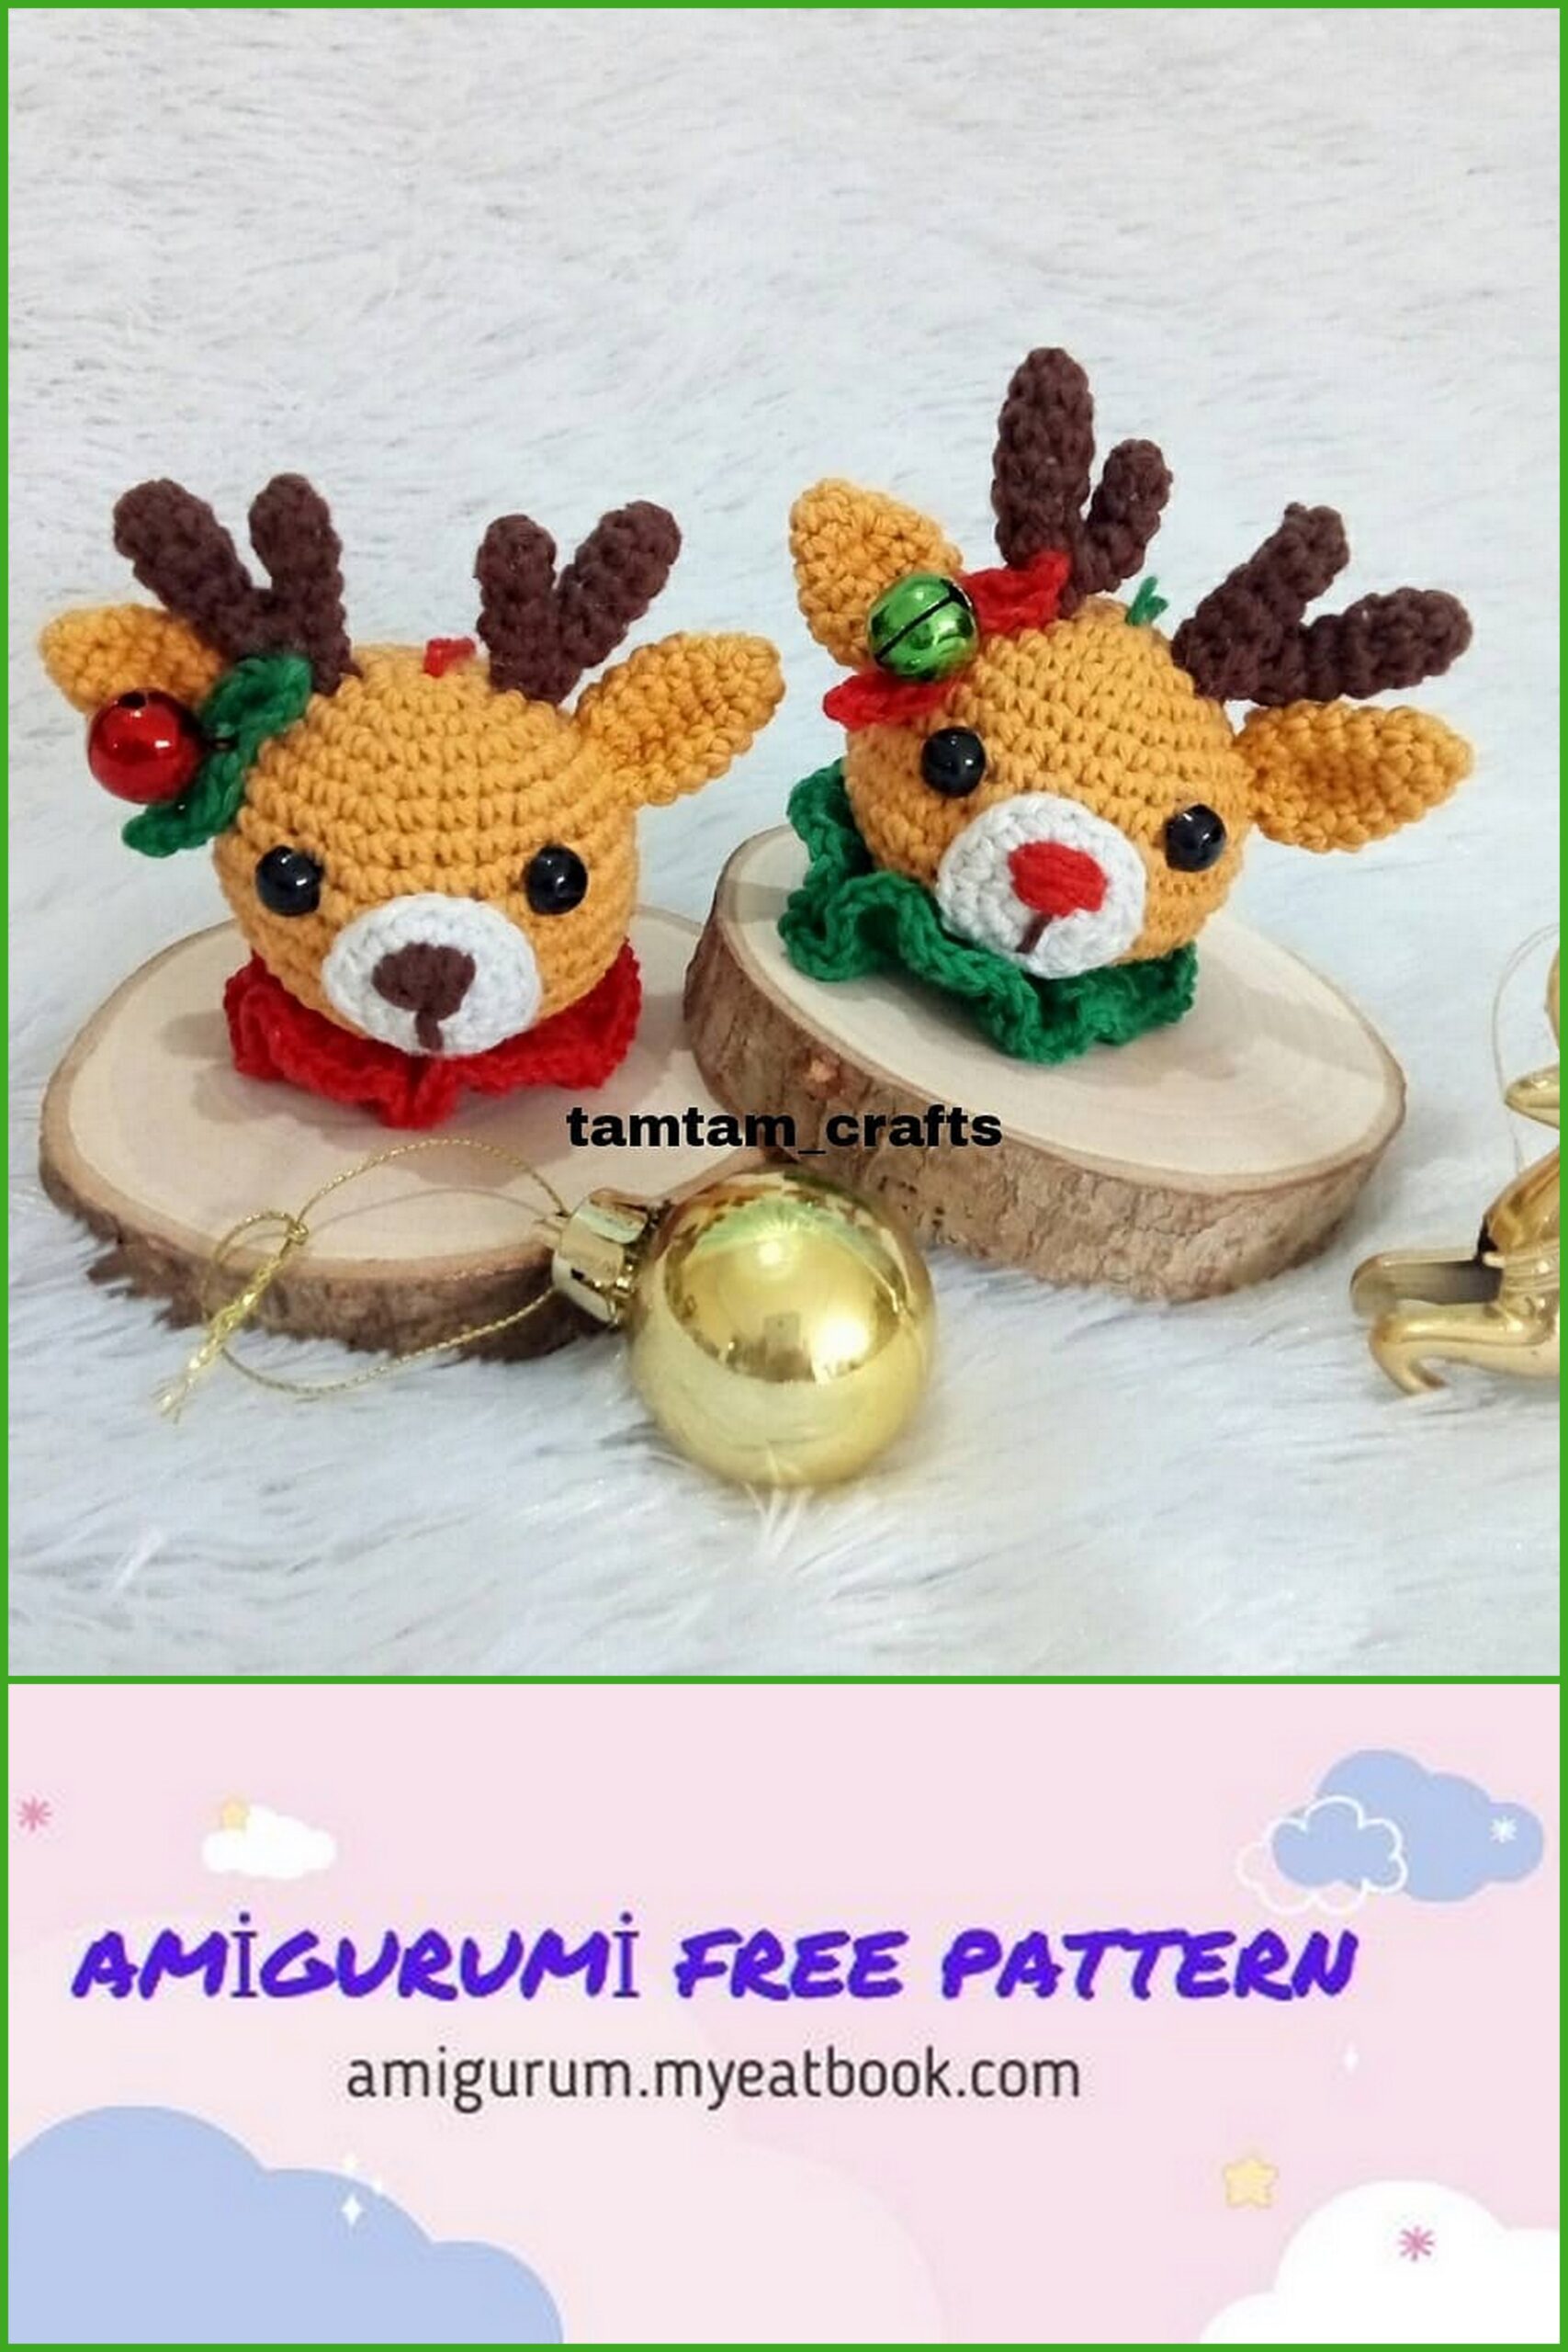
Horns and ears
Horns:
First, we knit the main branch, and sew additional ones to it.
Main part:
1r. – 2 Ch – in the second 4 Sc (or 4 Sc in the amigurumi ring)
2r.-18r. (or to the desired length) = 4 Sc, leave the thread for sewing to the head.
Cut the wire, along the length of the horn + 2 cm (stick it in the head and sew in the assembly), isolate
the ends, put inside the horn, I did not need a packing, the insulated wire is completely
tightly sat inside.
Additional branches (I have 2 of them
for each horn):
1r. – 2 Ch – in the second 4 Sc (or 4 Sc in the amigurumi ring)
2r.-5r. (or to the desired length) = 4Sc, leave the thread for sewing.
I did not stuff extra branches or insert wire into them, I have velor horns and he
keeps shape perfectly.
Assembly:
To give the desired shape to the main branch on the wire, sew additional branches to
main.
Ears:
1r. – 2 Ch – in the second 6 Sc (or 6 Sc in the amigurumi ring)
2 p. – (2Sc, İnc.) * 2 = 8 Sc
3.R. – (3Sc, İnc.) * 2 = 10 Sc
4p-6p. = 10 Sc
7 p. – (3Sc, Dec) * 2 = 8Sc
8 p. = 8 Sc
9 p. – (2Sc, Dec.) * 2 = 6 Sc
8 pp .- (Dec) * 3
9.R. knit all 3 loops together Sc or tighten with a needle.
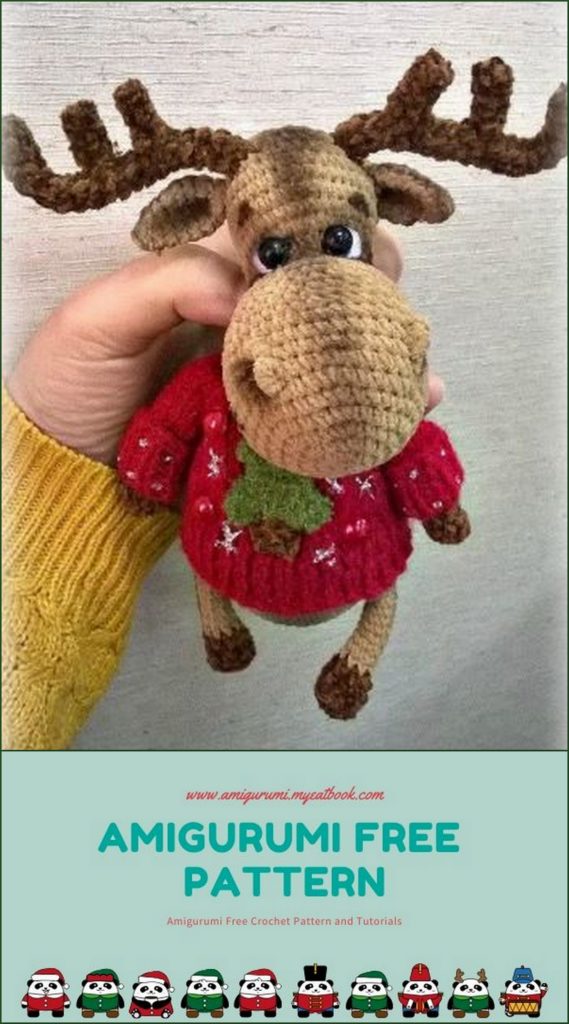
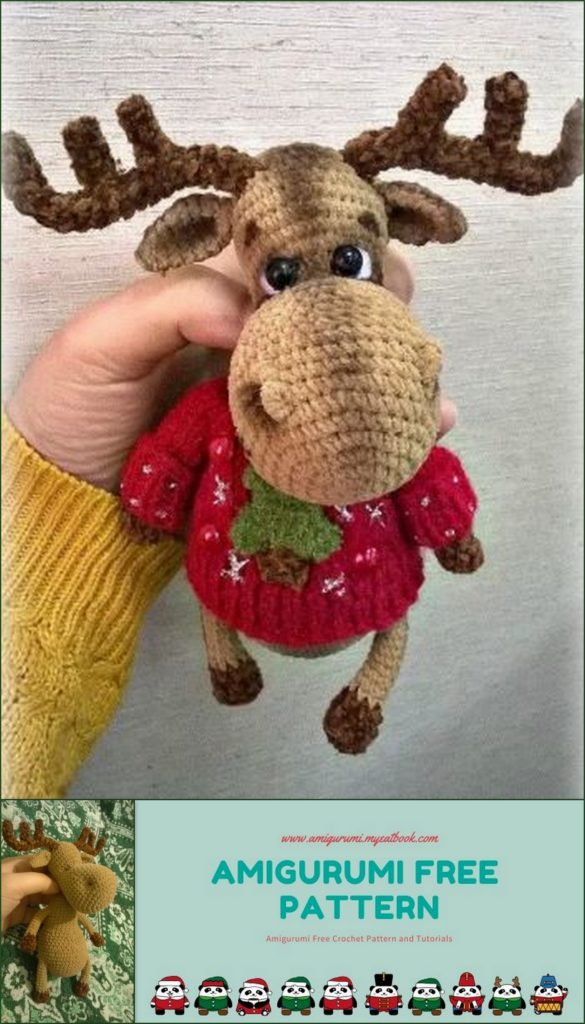
Flatten the prepared eye slightly at the base and grab it with a needle and thread, for the beauty of the form. (See.
finished photo of moose) lightly tint the inside with pastel, shadow or marker.
Head:
the marker passes strictly along the bottom, along the back (not in the face), moving to the back of the head.
1r. – 2 Ch – in the second 6 Sc (or 6 Sc in the amigurumi ring)
2 p. – (İnc.) * 6 = 12 Sc
3 p. – (1Sc, İnc) * 6 = 18 Sc
4 p. – (2 Sc, İnc) * 6 = 24 Sc
5 p. – (3 Sc, İnc) * 6 = 30 Sc
6 p. – (4 Sc, İnc). * 6 = 36 Sc
7 p. – (5Sc, İnc.) * 6 = 42 Sc
8r – 11r = 42 Sc
12 p. – (5Sc, Dec.) * 6 = 36 Sc
13 RUR – (4 Sc, Dec.) * 6 = 30 Sc
14p. -30Sc
15 pp. -11Sc, (Dec) * 4, 11Sc = 26 Sc
16 pp. – 9Sc, (Dec) * 4, 9Sc = 22Sc
17R-9Sc, (Dec) * 2, 9Sc = 20 Sc
18 p. – 8Sc, (İnc) * 4, 8Sc = 24 Sc
19 p. – 9Sc, (İnc) * 6, 9Sc = 30 Sc
20 RUR = 30Sc
21p .- (4 Sc, İnc) * 6 = 36Sc
22 p. = 36 Sc
23r .- (4Sc, Dec) * 6 = 30Sc
24r .- (3Sc, Dec) * 6 = 24Sc
25r. = 24 Sc
26 p. – (2Sc, Dec) * 6 = 18 Sc
27 RUR – (1Sc, Dec) * 6 = 12 Sc
28 p. – (Dec.) * 6 = 6 Sc
29p tighten the hole.
Now we take the horns and with the help of the free end of the wire we put in the head, we are looking for something
the position that we like, follow the symmetry of the location of the horns as soon as found
favorable position, sew on the horns. Sew ears under the horns, respectively, for 1-2 rows
below as you like.
Stick a wire from the neck into the head, sew on.
I made a recess for the eye, but you can do without it, it turns out no worse.
I inserted the needle at the junction of the neck with the head, chose a place for the eyes (here to my taste
be guided) and introduced to point 1- then to point 2 and again to the place of attachment of the neck with the head, a little
to tighten, helping with a finger, to fix. The same goes for the second eye from the other side – in place
connecting the neck with the head- to point 1- then to point 2 and again to the place of attachment of the neck with the head, a little
to tighten, helping with a finger, to fix.
Cut pieces of white felt for eye proteins, stick to the head. (Can be rolled, made from
plastic or embroider, no felt – use a piece of cotton pad.) Glue black on top
half beads or finished eyes. If desired, form eyelids from a piece of suede on top.
a cord or chain of air loops.
The design of the nostrils:
We plan the location of the nostrils, for this I just flattened my face with my fingers, I looked for something
position that I liked. Then put 4 needles, the distance between points 3
row. Enter the thread (to point 1- to point 2 –to point 3 – to point 4,) repeat again, pull, thread
to fix, we get a place for the nostrils. Fasten the thread on the bridge of the nose, insert the needle at point 1 and
from above we enter at point 4 (the border of the nostrils) a stitch is obtained, we wind it with a thread so that
it turned out a flagellum, fixed. We do the same with the second nostril.
It is simpler: tie 2 chains of 7 loops, knit 7 single crochet on them and sew
over the nostrils.
I tinted the area around the eyes with dry pastel, the inside of the ears and nostrils, painted
eyebrows and a smile, but you can embroider.
You can knit a sweater yourself, you can put on another clothes
Clothes
Leg warmers (optional)
I did my elk like this: a chain of 7-8 loops (I had velor, I scored to the desired
lengths) and each row knitted 7 stbn ONLY BACK TO THE BACK wall of the loop until it got coverage
legs.Sew. put on. decorate.
Pullover
The sweater came up to my Timofey, I knitted it from a children’s novelty, but since everyone has materials
different, the description will be approximate.
Knit on 2 knitting needles, top to bottom. sew on the back.
Type 24 stitches on the knitting needles.
1-10 row knit with an elastic band 1×1 (1 front, 1 wrong side) (I just wanted to unscrew the neck,
I love lapels, if you don’t really like it, knit 5 rows of elastic)) finished the elastic,
go to a flat canvas.
11 row- (1 increase of persons.loop, 2 persons.) * 8 = 32
12 row = 32 out
13 row- (1 increase from persons. Loop, 3 persons.) * 8 = 40
14 row = 40 out
15 row = 40 persons
16 row = 40
17th row = 40 persons.
18 row = 40 out.
19 row = (1 increase of persons.loop, 4 persons.) * 8 = 48
20 row = 8 lifes, 8 loops to be removed from a pin (future sleeve), 16 out of stock, 8 loops to be removed from a pin (I have
thread) (future sleeve), 8 lifes = 32 loops on the working needle and 8 loops on 2 pins.
21 row = (1 increase from persons.loop, 3 persons.) * 4 (3 persons, 1 increase from persons.loop) * 4 = 40
= 40
22 row = 40 out
23 row = 40 persons
24 row = 40 out
25 row = (4 persons, 1 increase from persons. Loops) * 4 (1 increase from persons. Loops, 4 persons.) * = 48 Try on a sweater,
if the pusiko fits freely, then we knit further to the desired length without increases, then
go to reknit 1×1 (1 person. 1 out) knit 5-6 rows, close knitting, leave thread for stitching.
Sleeves.
1 row-1İnc. persons, 2 persons, 2 İnc. persons, 2 persons, 1 İnc. persons = 12
We knit to the desired length (whoever loves lapels, we knit 10-12 rows with 1×1 elastic at the end)
similarly tie the second sleeve, leave the thread for stitching.
Sew sleeves, make lapels.
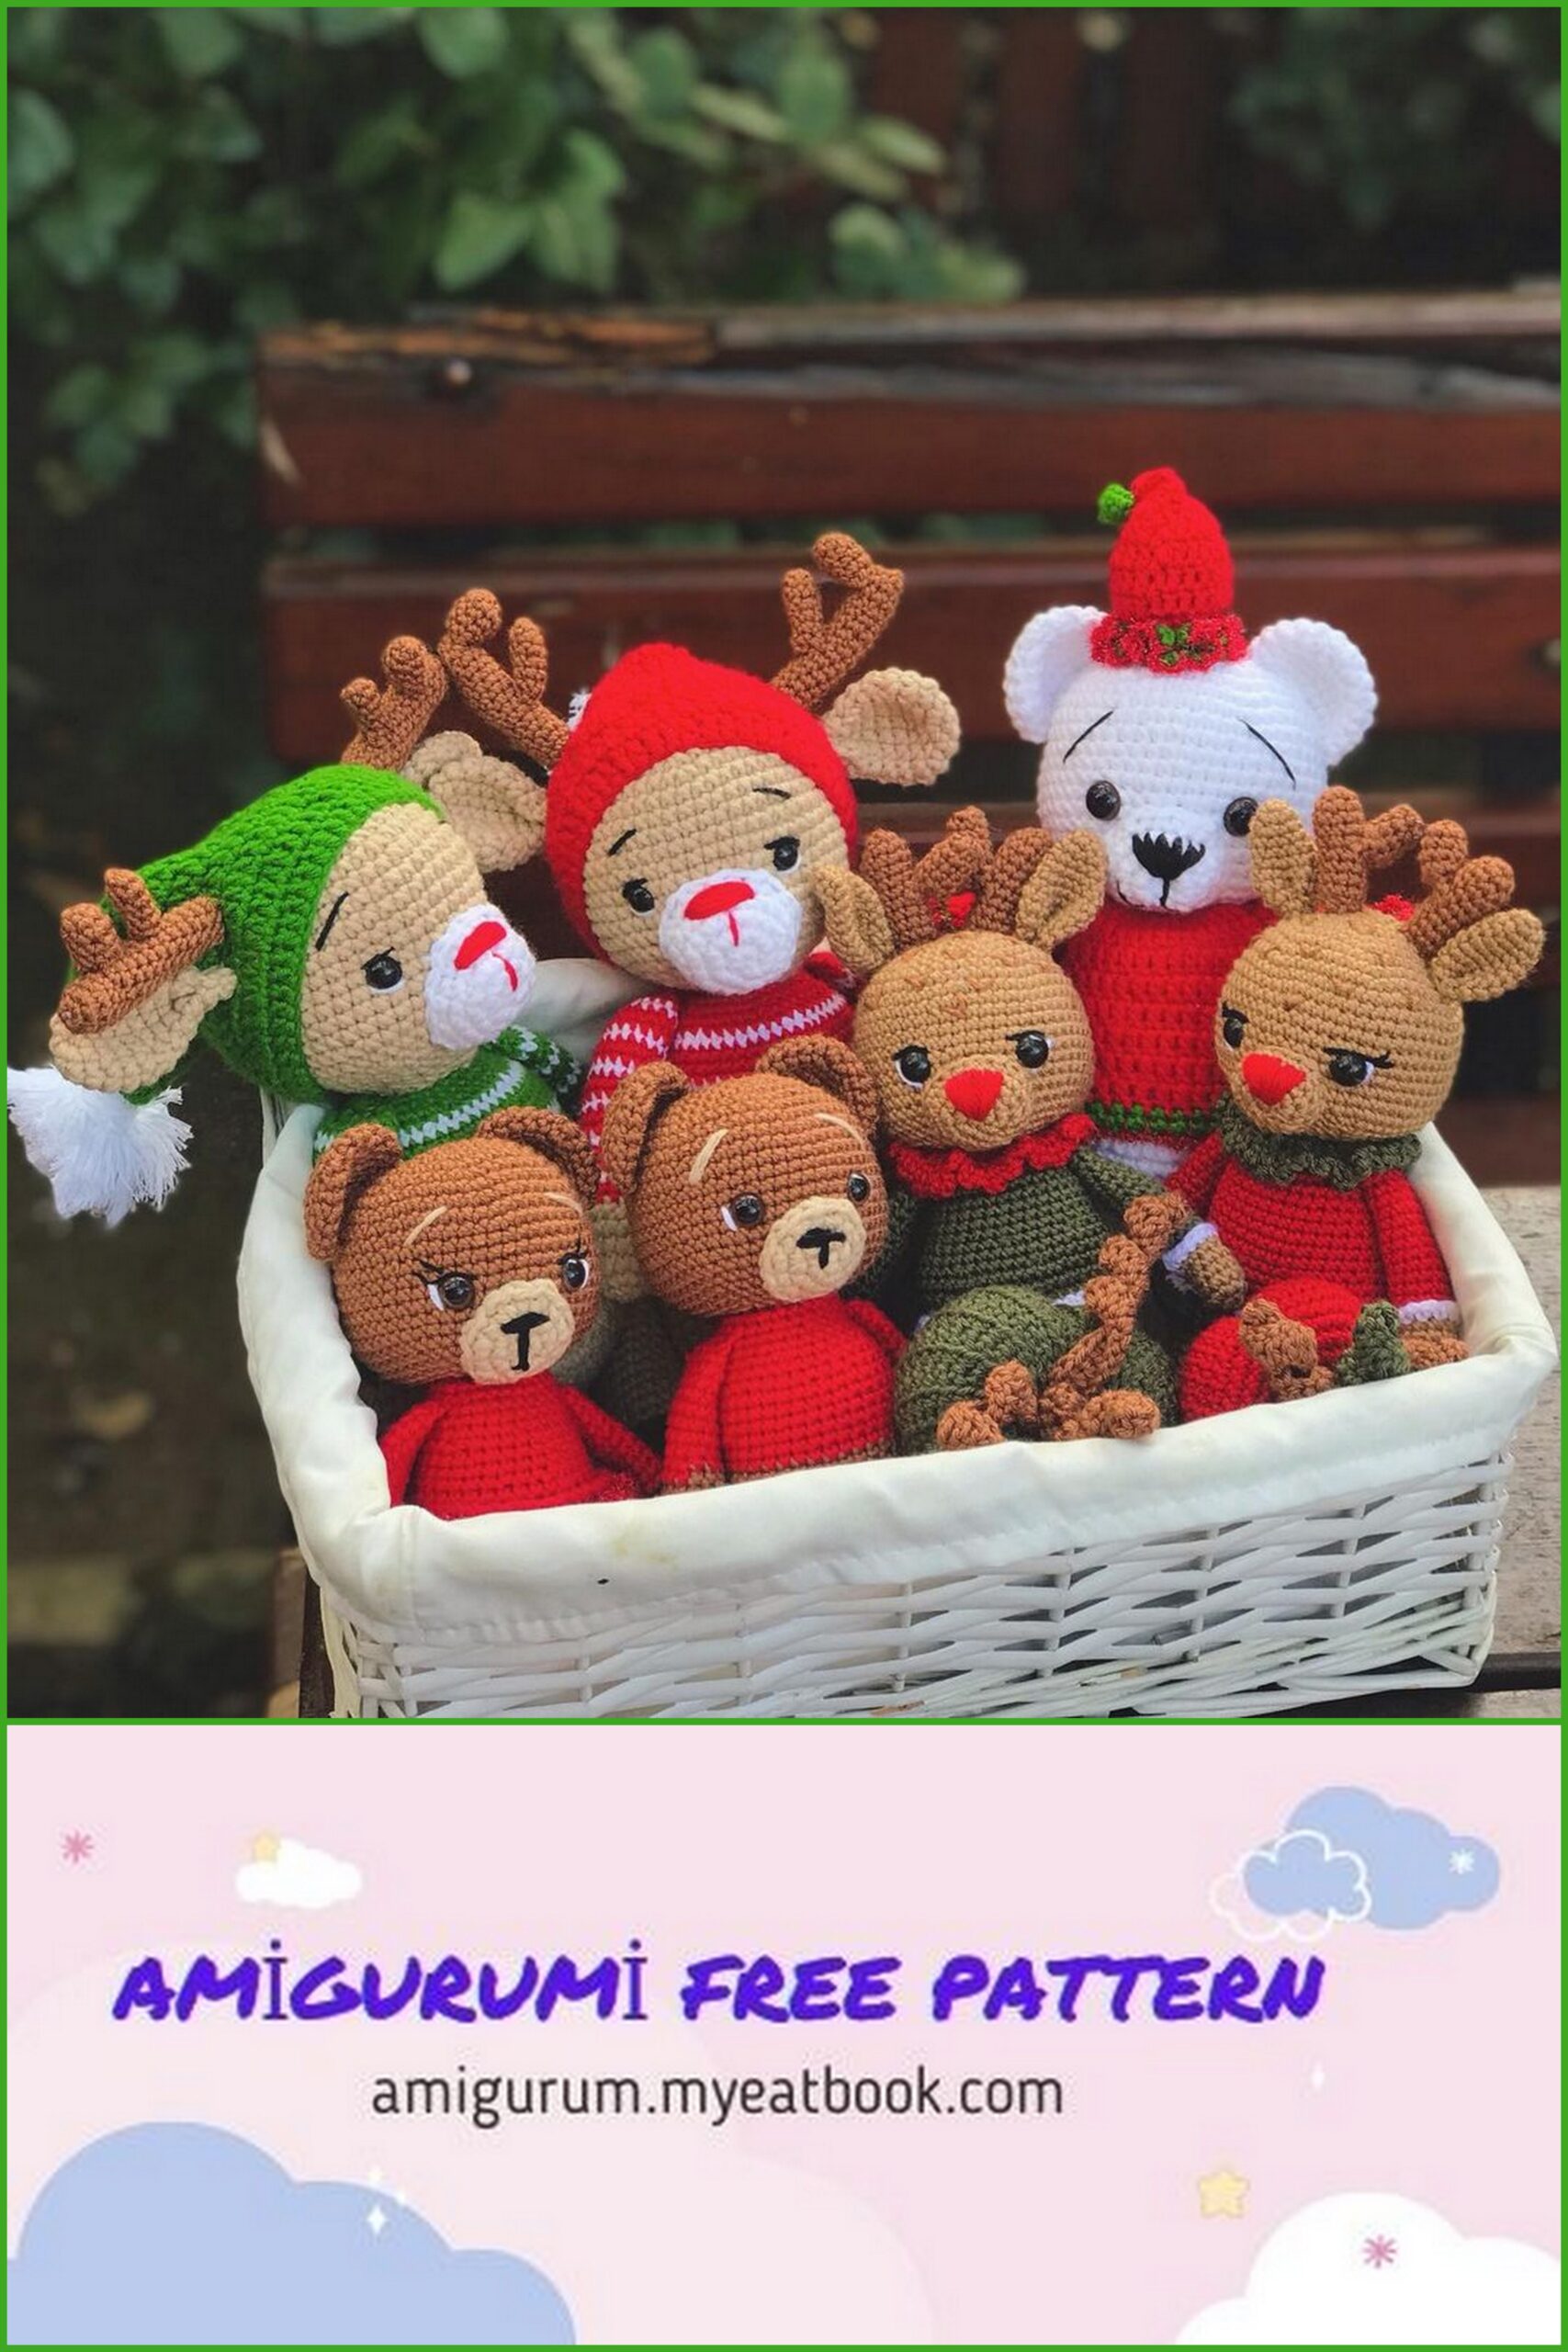

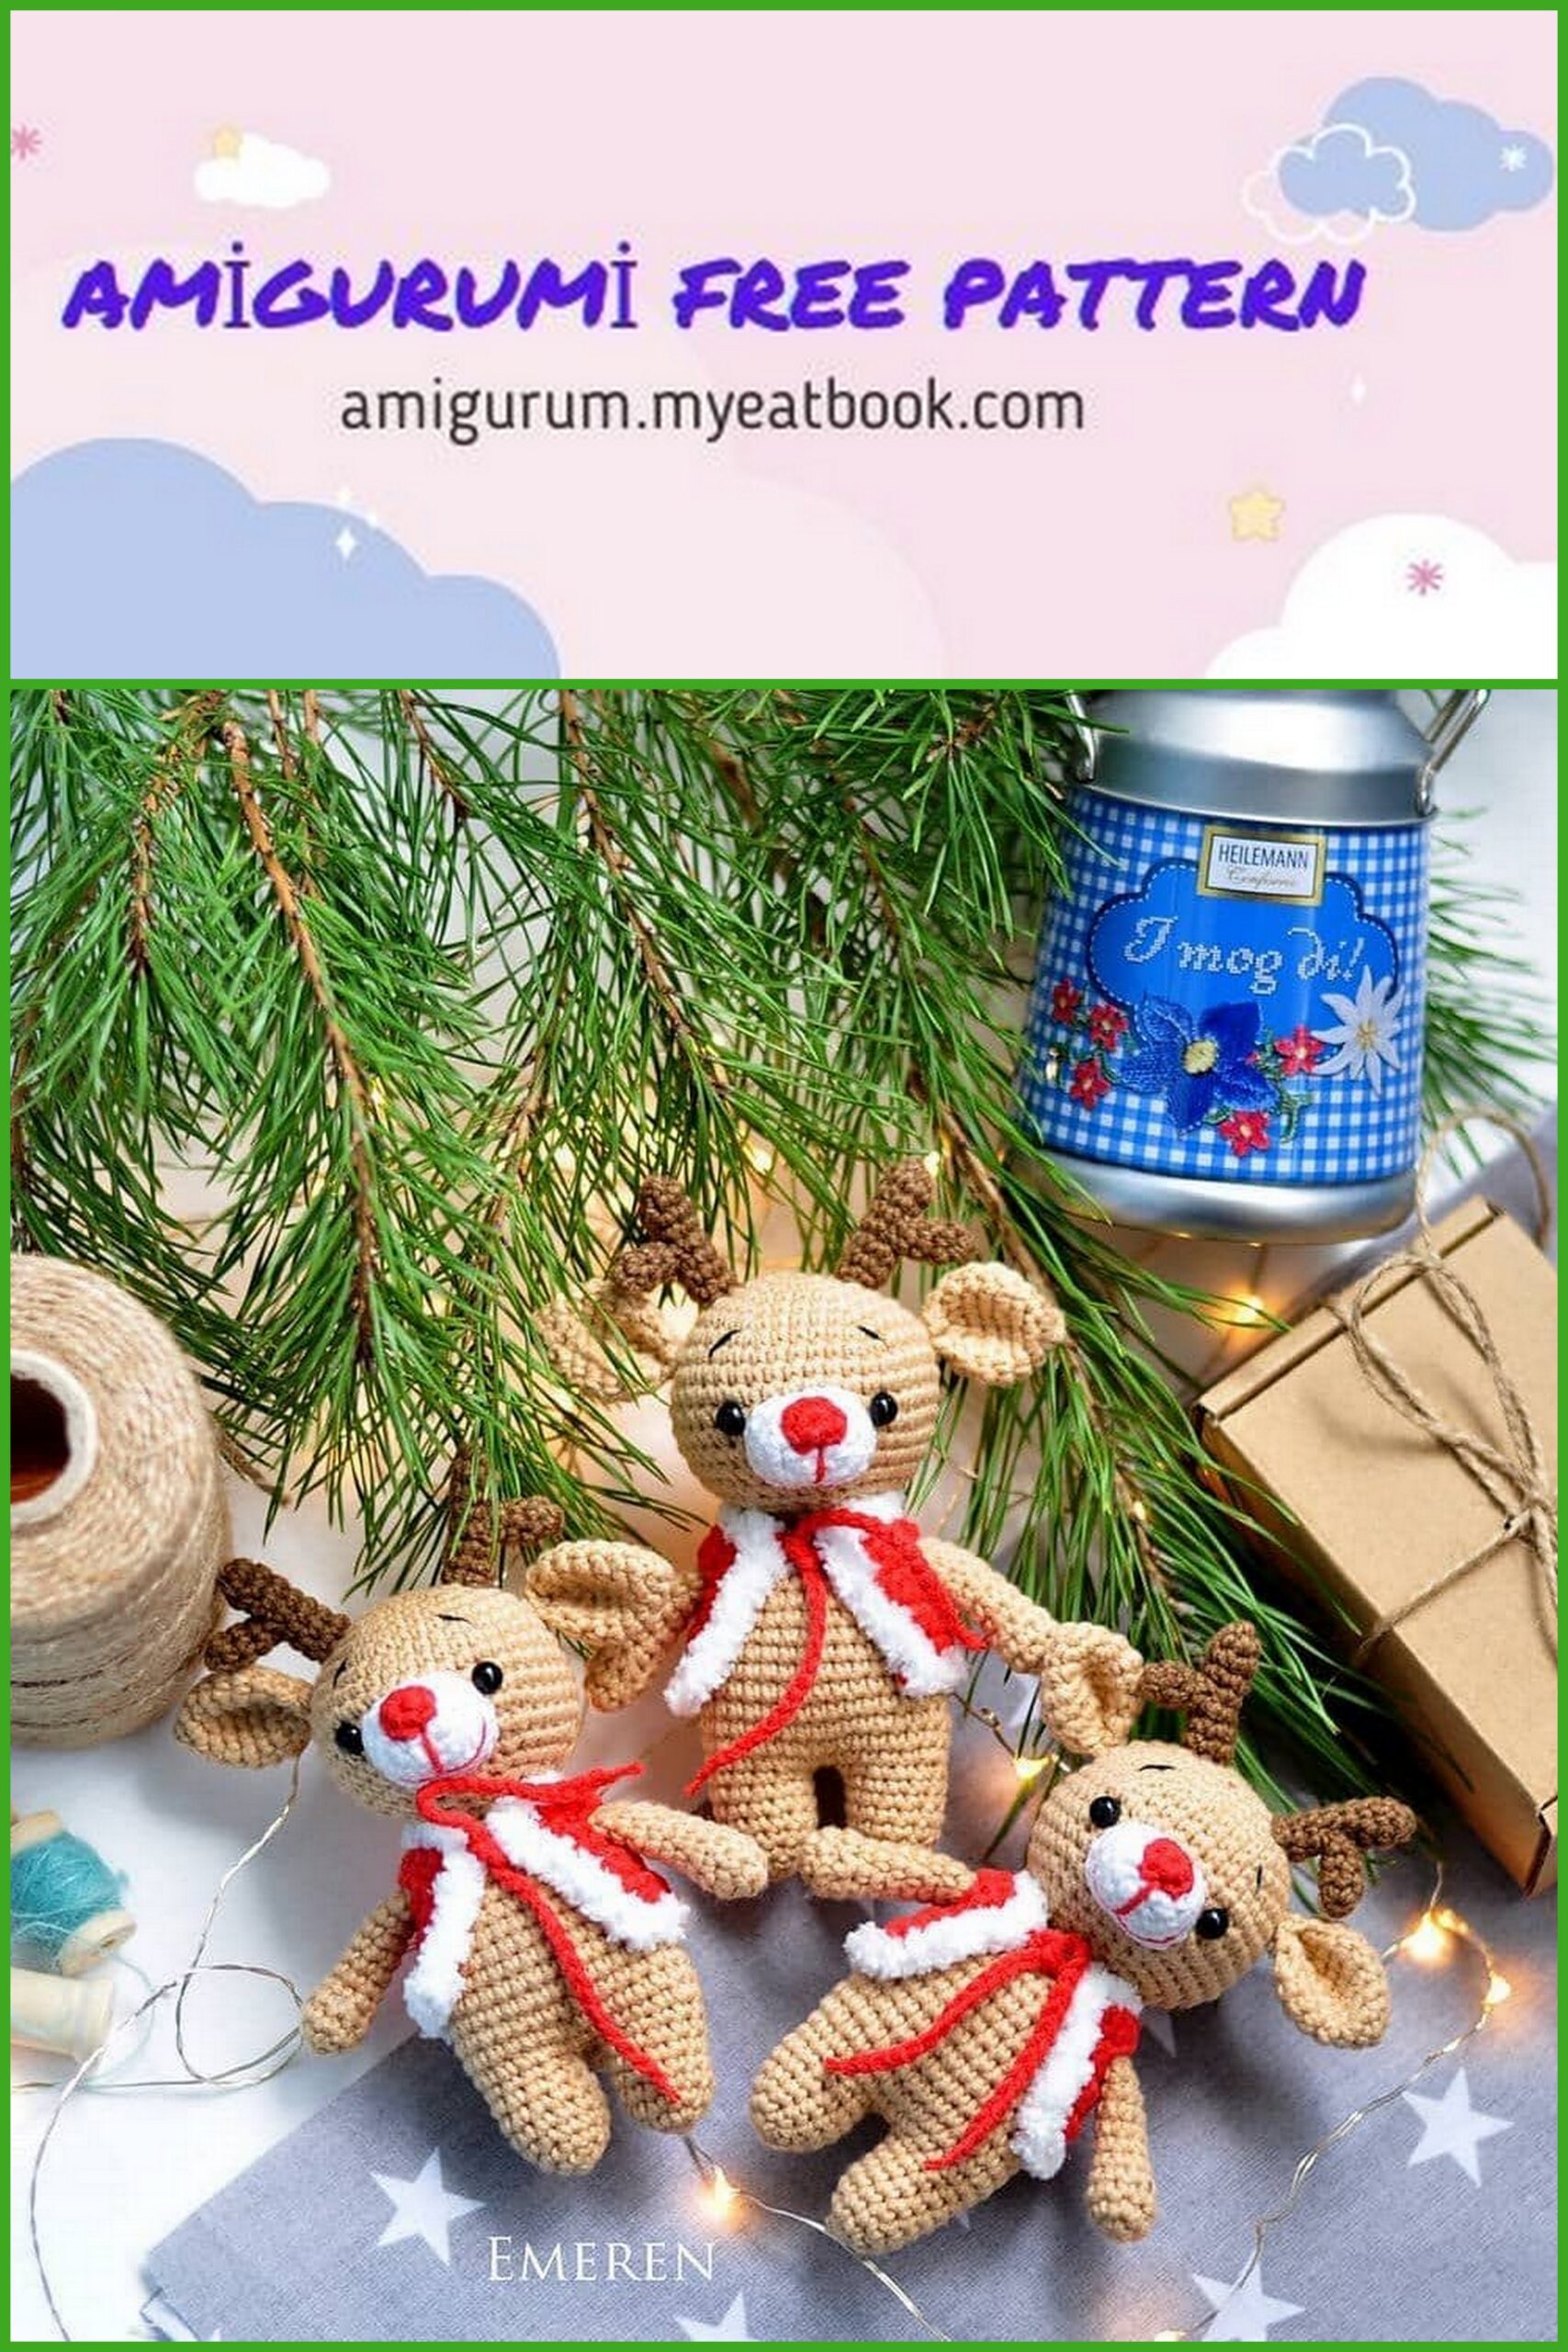

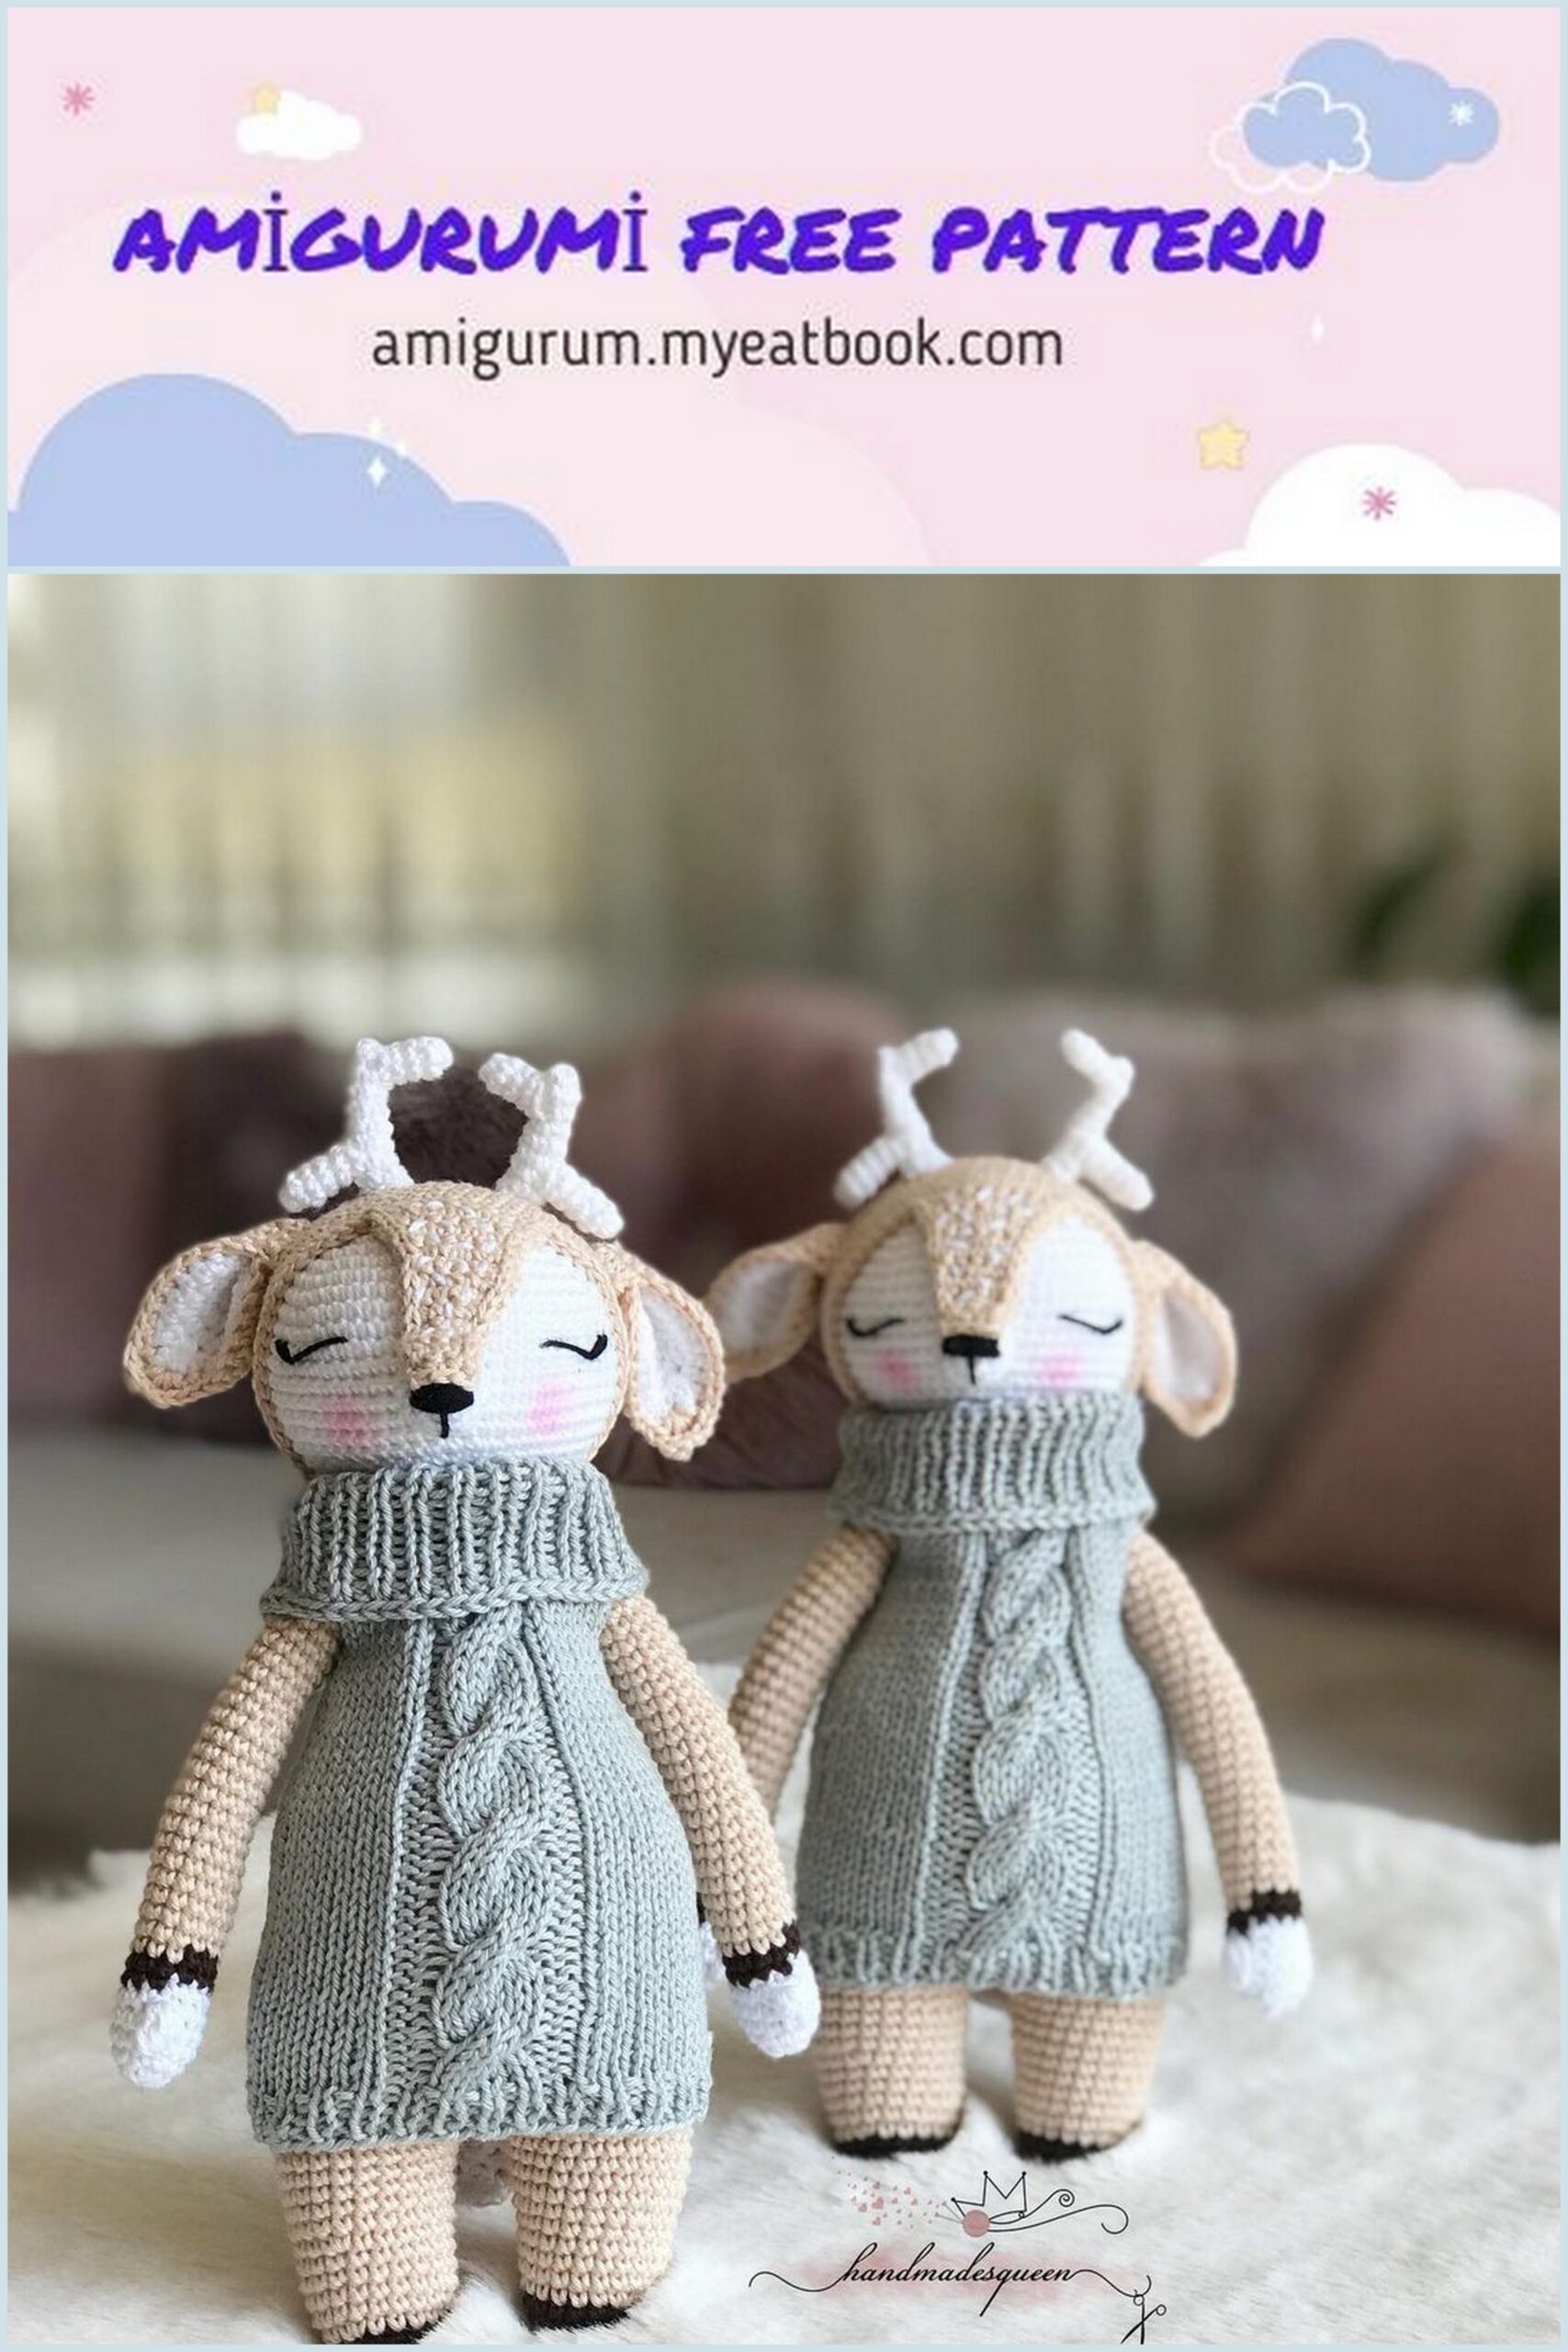
Decorate as you wish, dress up Losik.