
Necessary materials:
Yarn of the main color – 100 g (per 300 m)
Black beads or finished eyes – 2 pcs.
Filler.
Perhaps – a wire for a proboscis.
I knitted my elephant from cotton Cotton grass (Kamtex) – left exactly one punch.
Corpuscle
1p – 2Ch – in the 2nd 6 Sc
2p – (İnc) * 6 = 12 Sc
3p – (1 Sc, İnc) * 6 = 18 Sc
4p – (2 Sc, İnc) * 6 = 24 Sc
5p – (3 Sc, İnc) * 6 = 30 Sc
6p – (4 Sc, İnc) * 6 = 36 Sc
7p – (5 Sc, İnc) * 6 = 42 Sc
8-17рр = 42 Sc
18p – (1 Sc, Dec) * 6, 24 Sc = 36 Sc
19p = 36 Sc
20p – Dec * 6, 24 Sc = 30 Sc
21-23рр = 30 Sc
24p – (3 Sc, Dec) * 6 = 24 Sc
25-26rr = 24 Sc
27p – (2 Sc, Dec) * 6 = 18 Sc, fasten the thread, leave the end for sewing.

Head
1p – 2Ch – in the 2nd 6 Sc
2p – (İnc) * 6 = 12 Sc
3p – (1 Sc, İnc) * 6 = 18 Sc
4p – (2 Sc, İnc) * 6 = 24 Sc
5p – (3 Sc, İnc) * 6 = 30 Sc
6p – (4 Sc, İnc) * 6 = 36 Sc
7p – (5 Sc, İnc) * 6 = 42 Sc
8p – (6 Sc, İnc) * 6 = 48 Sc
9p – (7 Sc, İnc) * 6 = 54 Sc
10p – (8 Sc, İnc) * 6 = 60 Sc
11-24rr = 60 Sc
25p – İnc * 10, 6 Sl-st, İnc * 10, 34 Sc = 80 Sc
26p – 20 Hdc, 6 Sc, 20 Hdc, 34 Sc = 80 Sc
27p – 20 Hdc, 6 Sc, 20 Hdc, (5 Sc, Dec) * 4, 6 Sc = 76 Sc
28p – Dec Hdc * 10, 6 Sc, Dec Hdc * 10, (4 Sc, Dec) * 4, 6 Sc = 52 Sc
29p – (7 Sc, Dec) * 5, 7 Sc = 47 Sc
30p – (6 Sc, Dec) * 5, 7 Sc = 42 Sc
31p – (5 Sc, Dec) * 6 = 36 Sc
32p – (4 Sc, Dec) * 6 = 30 Sc
31p – (3 Sc, Dec) * 6 = 24 Sc
32p – (2 Sc, Dec) * 6 = 18 Sc
Trunk
1p – 2Ch – in the 2nd 6 Sc
2p – (İnc) * 6 = 12 Sc
3-5rr = 12 Sc
6p – (3 Sc, İnc) * 3 = 15 Sc
7p = 15 Sc
8-9rr – Dec * 2, 4 Sc, İnc * 2, 5 Sc = 15 Sc
10p – (4 Sc, İnc) * 3 = 18 Sc
11-12rr = 18 Sc
13-14rr – Dec * 2, 5 Sc, İnc * 3, 4 Sc, Dec = 18 Sc
15p = 18 Sc
16p – (2 Sc, İnc) * 6 = 24 Sc
17p = 24 Sc
18-19 pp – 5 Hdc, 6 Sc, 6 Sl-st, 6 Sc, 1 Hdc = 24 Sc
20p (incomplete) – 5 Hdc, 1 Sl-st, leave the thread for sewing.
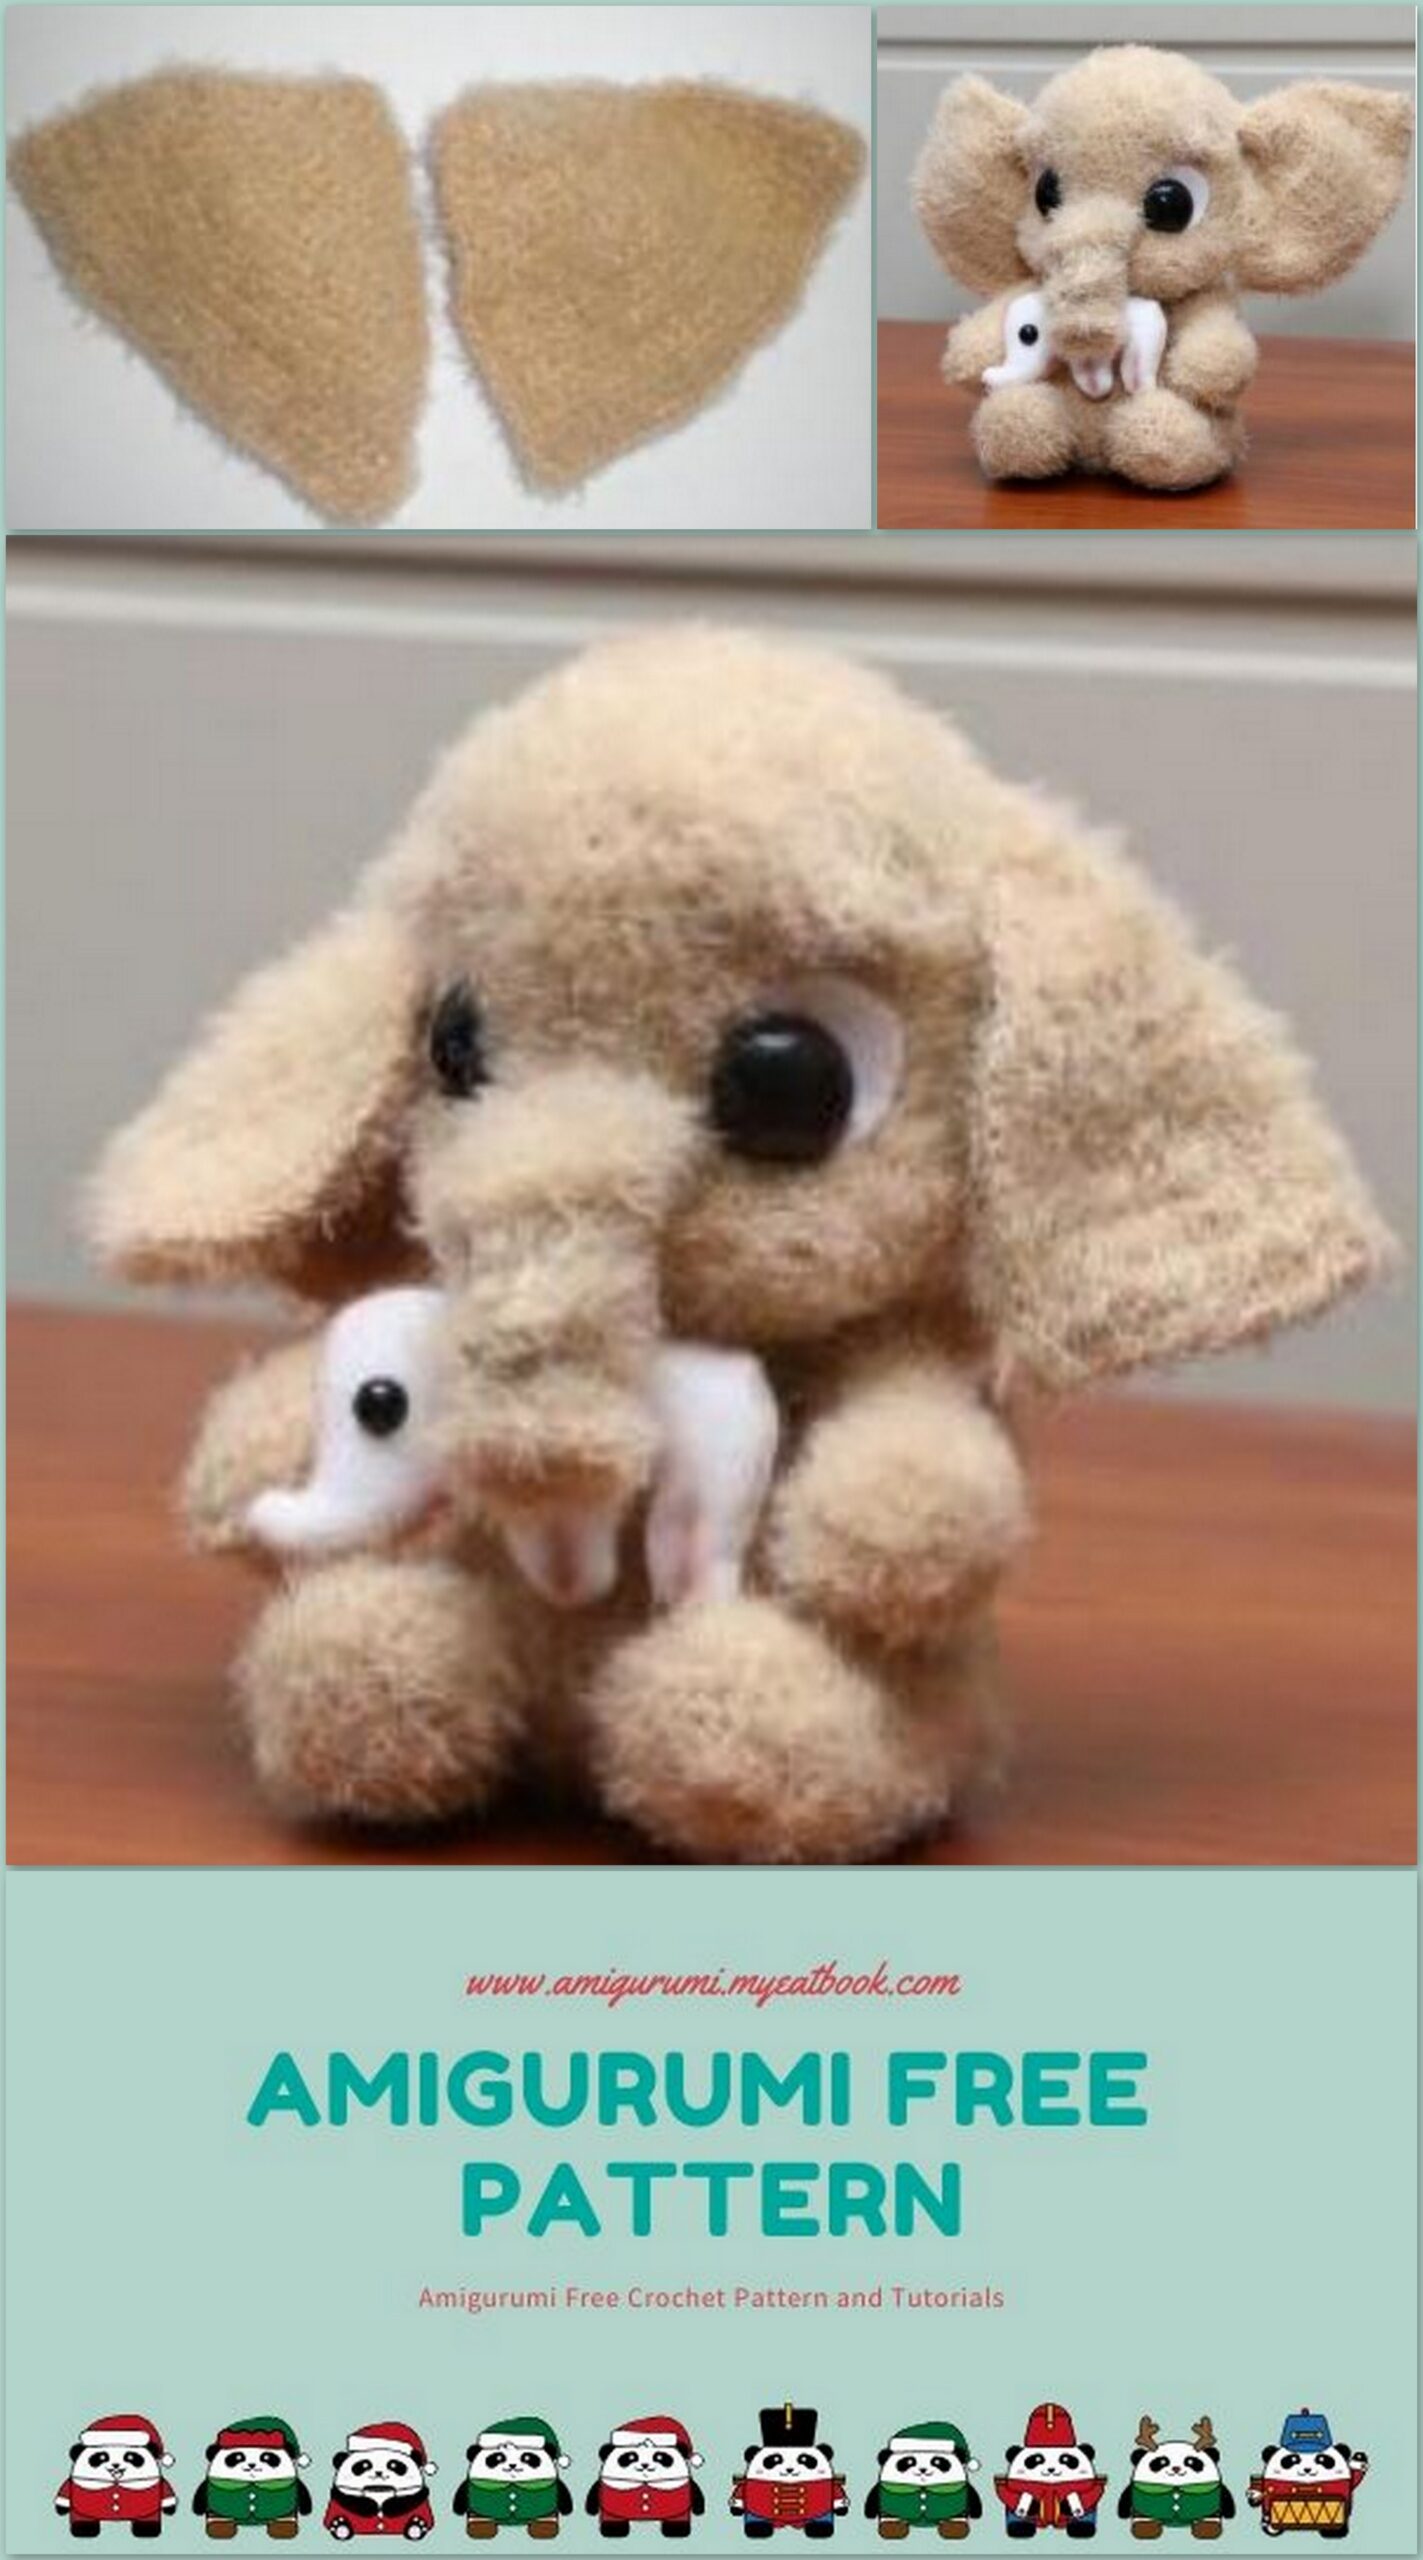
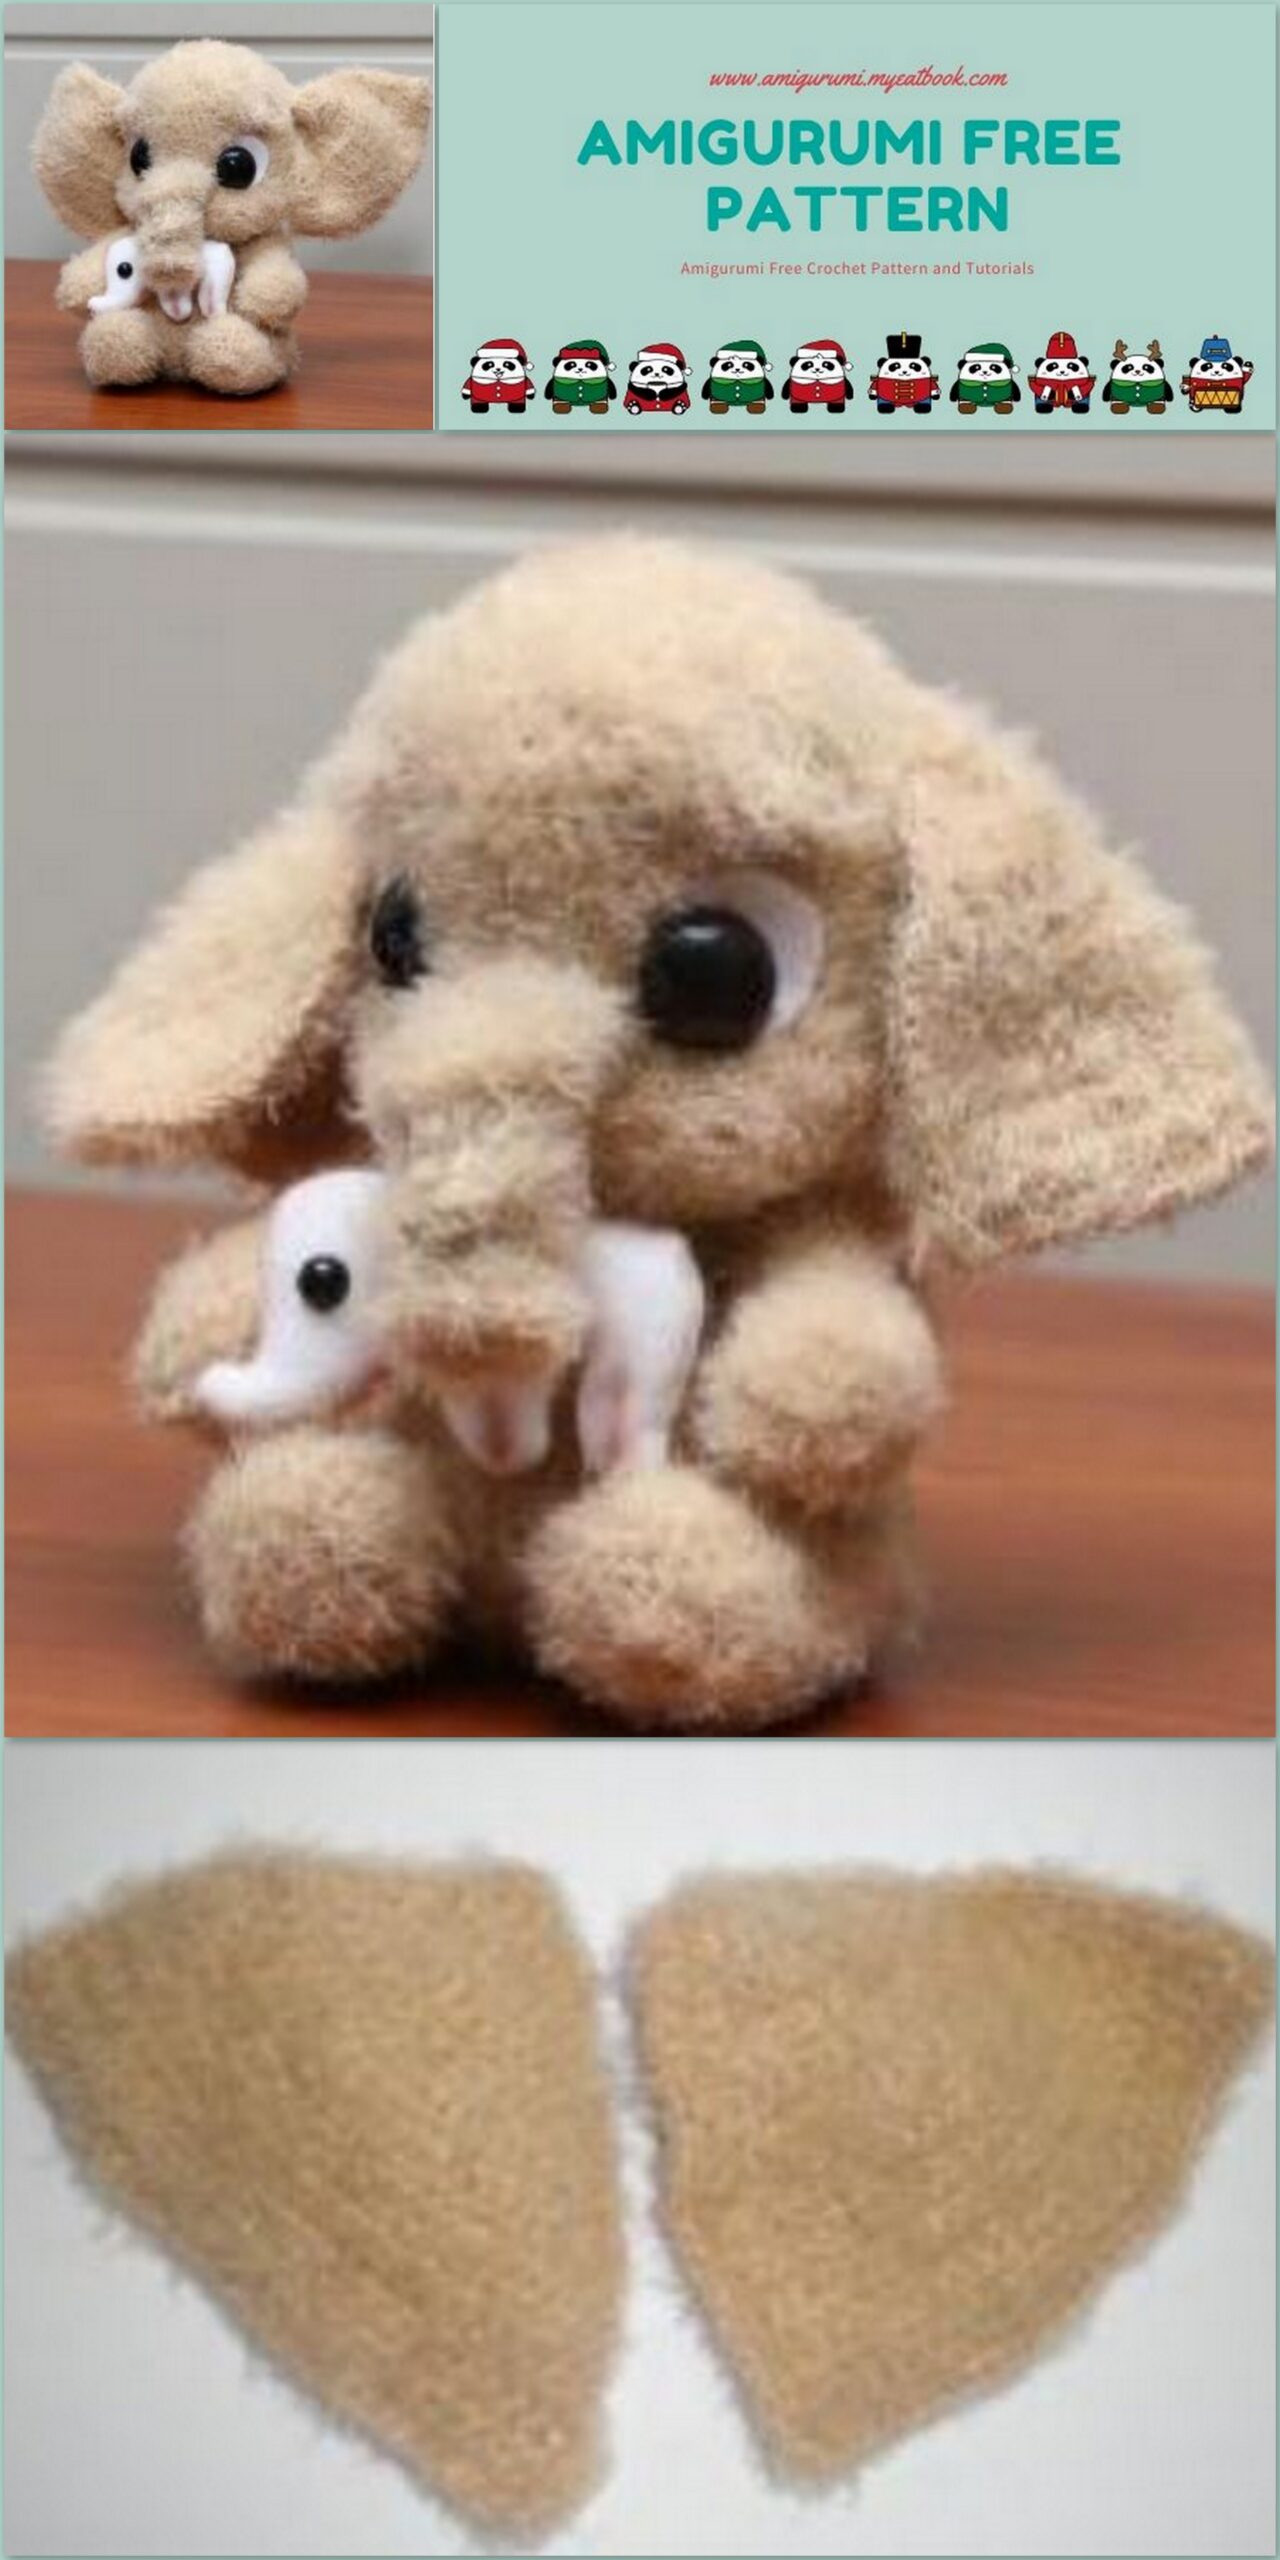
Ears (2 parts)
Knit in rotary rows
Dial 6 Ch
1p – 5 Sc, Ch, pov
2p – (İnc, 1 Sc) * 2, İnc = 8 Sc, Ch,
3p = 8 Sc, Ch, pov
4p – İnc, 2 Sc, İnc * 2, 2 Sc, İnc = 12 Sc, Ch,
5-6rr = 12 Sc, Ch, pov
7p – İnc, 10 Sc, İnc = 14 Sc, Ch, pov
8p – İnc, 12 Sc, İnc = 16 Sc, Ch, pov
9p – İnc, 5 Sc, İnc, 1 Sc, İnc, 6 Sc, İnc = 20 Sc, Ch,
10p – İnc, 7 Sc, İnc, 1 Sc, İnc, 8 Sc, İnc = 24 Sc, Ch,
11-18 pp = 24 Sc, Ch, pov
19p – İnc, 7 Sc, İnc, 6 Sc, İnc, 7 Sc, İnc = 28 Sc, Ch,
20p – İnc, 8 Sc, İnc, 8 Sc, İnc, 8 Sc, İnc = 32 Sc.
The part is tied with crochets around the entire perimeter.
Tail
1p – 2Ch – in the 2nd 6 Sc
2p – (1 Sc, İnc) * 3 = 9 Sc
3p = 9 Sc
4p – (1 Sc, Dec) * 3 = 6 Sc
5p = 6 Sc
6p – Dec * 3, then tie a chain of 9 air loops and 8 Sc over them, thread
fasten and hide.
Upper pair of legs (2 parts)
1p – 2Ch – in the 2nd 6 Sc
2p – (İnc) * 6 = 12 Sc
3p – (1 Sc, İnc) * 6 = 18 Sc
4p – for the back p / p (if knitted on the wrong side with textured yarn – then for
front p / p) = 18 Sc
5-9pp = 18 Sc
10p – (Dec, 1 Sc) * 2, 4 Sc, (İnc, 1 Sc) * 2, 4 Sc = 18 Sc
11p – Dec, 1 Sc, Dec, 5 Sc, İnc, 1 Sc, İnc, 5 Sc = 18 Sc
12p = 18 Sc
13-14рр – Dec, 1 Sc, Dec, 5 Sc, İnc, 1 Sc, İnc, 5 Sc = 18 Sc
15-16rr = 18 Sc
For the left
17p – 8 Sl-st, 10 Hdc = 18
18p – 8 Sc, 10 Hdc = 18, Ch, pov
19p (incomplete series) – Dec Hdc, 4 Hdc, Dec
Hdc
For the right
17p – 10 Hdc, 8 Sl-st = 18
18p – 10 Hdc, 8 Sc = 18
19p (incomplete row) – 2 Sc, Dec Hdc, 4 Hdc, Dec Hdc
If necessary, make offset loops if you see that the handle
twists. be careful
Bottom pair of legs (2 parts)
1p – 2Ch – in the 2nd 6 Sc
2p – (İnc) * 6 = 12 Sc
3p – (1 Sc, İnc) * 6 = 18 Sc
4p – for the back p / p (if knitted on the wrong side with textured yarn – then for
front p / p) = 18 Sc
5-9rr = 18 Sc
10-11rr – Dec * 3, 5 Sc, İnc * 3, 4 Sc = 18 Sc
12p = 18 Sc
13p – (2 Sc, İnc) * 6 = 24 Sc
14-15rr – Dec * 3, 6 Sc, İnc * 4, 6 Sc, Dec = 24 Sc
16-18rr = 24 Sc
19p – (2 Sc, Dec) * 6 = 18 Sc
20p – (1 Sc, Dec) * 6 = 12 Sc
21p – Dec * 6 = 6 Sc, tighten the loops.
Arms for the head and trunk
Define (visually) the middle of our future face – it’s just
will be between the increments that we did for the cheeks of our little elephant in
25th row. After we have decided on the middle – you need to do
eye liners. To do this, we introduce the needle from the bottom to the center and output to the left
an angle 2-3 rows above our cheeks (we have already decided that they
are in the 25th row), as shown in the photo.
Stepping back 3-4 Sc to the inner side of the eye, insert the needle and withdrawn again
lower in the center, thus making a tightening for the left eye. The same
we perform the procedure for the right eye – we introduce the needle from the bottom in the center
and display in the right corner of the eye, backing off 3-4 Sc – return to
starting position.
Ducks for future eyes are ready. You can do the same thing again
– if you want the eyes to sit deeper. Move on!
We outline future edges (if you certainly want them to be).
You can have them in different shapes – semicircular, as shown above on
photo, house, etc. Using a needle with ordinary stitches, we form
eyebrows.
The next step will be trimming the proboscis. So let’s get started!
The trunk of a little elephant is squeezed in his hands so that it takes the form of a spring –
this is necessary in order to make better stitches. After this
simple procedure, take a needle and visually highlighted after compression
places, we do stitches, like this:
It turns out here is such a proboscis:
At will, we insert into the proboscis a wire frame for mobility and
shaping.
Assembly:
It remains only to sew our proboscis to the head of an elephant calf. Choose a place
between the cheeks
Sew on the ears. For the ears, I chose a place almost at the level of the eyebrows,
maybe a little higher, bending them slightly at the base, sewn to the head
baby elephant
Next, we cut the whites of the eyes with the desired shape from white felt and glue them
along with black large beads. We place in the right place on
to the elephant’s head, if everything suits you, we glue it. Sew the body
to the finished head, sew the upper and lower pairs of legs and tail.
We comb (if the yarn allows it), it is possible to tint and
brown the cheeks and our baby elephant (head) is ready.