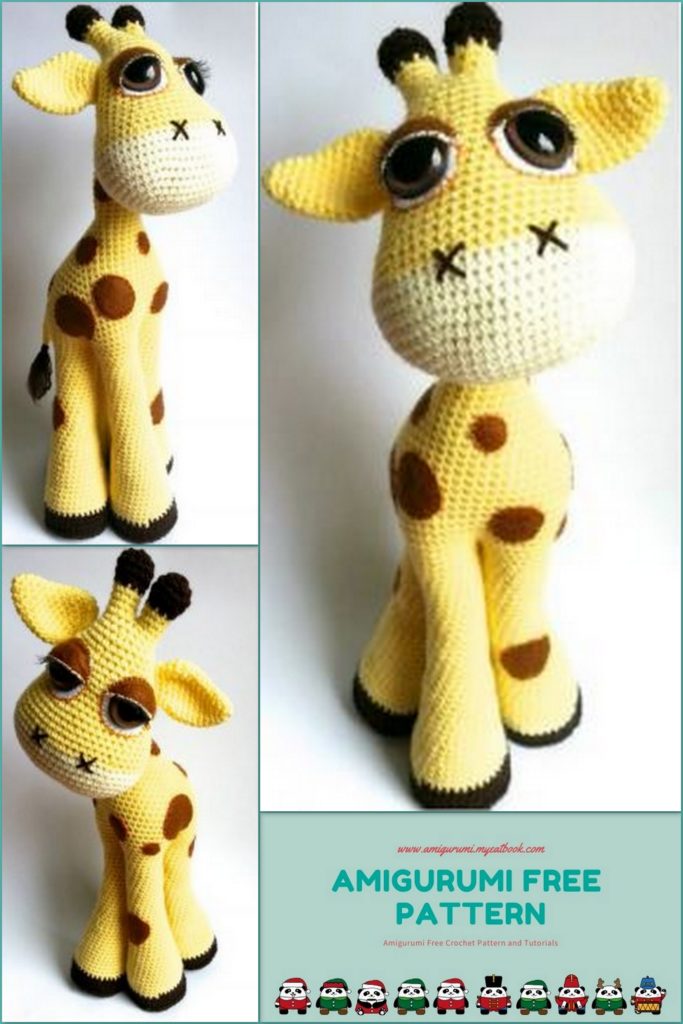
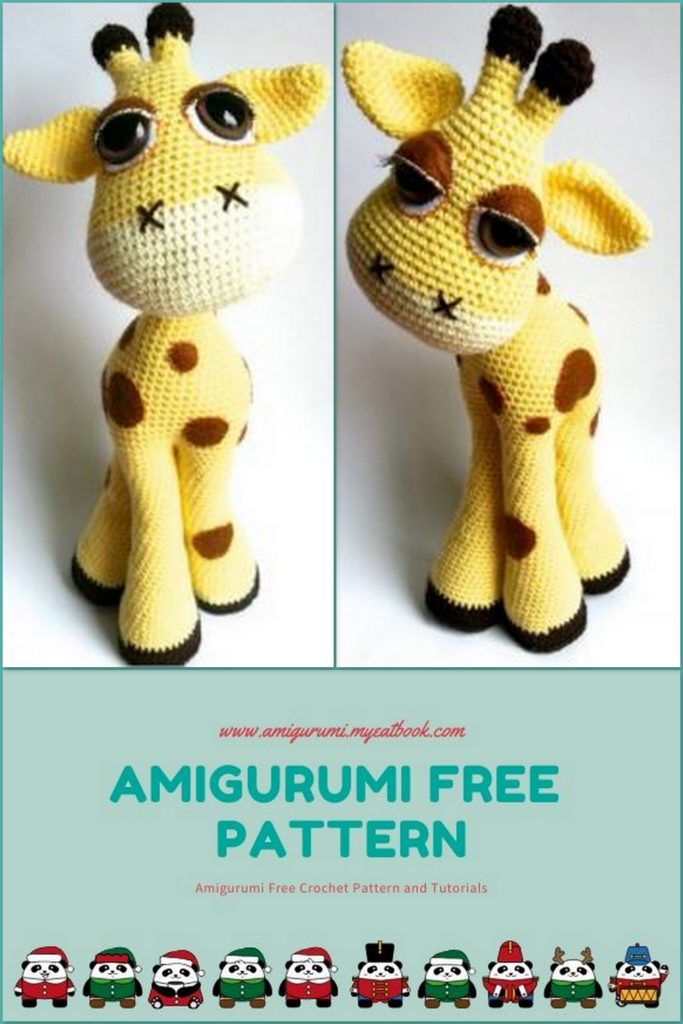
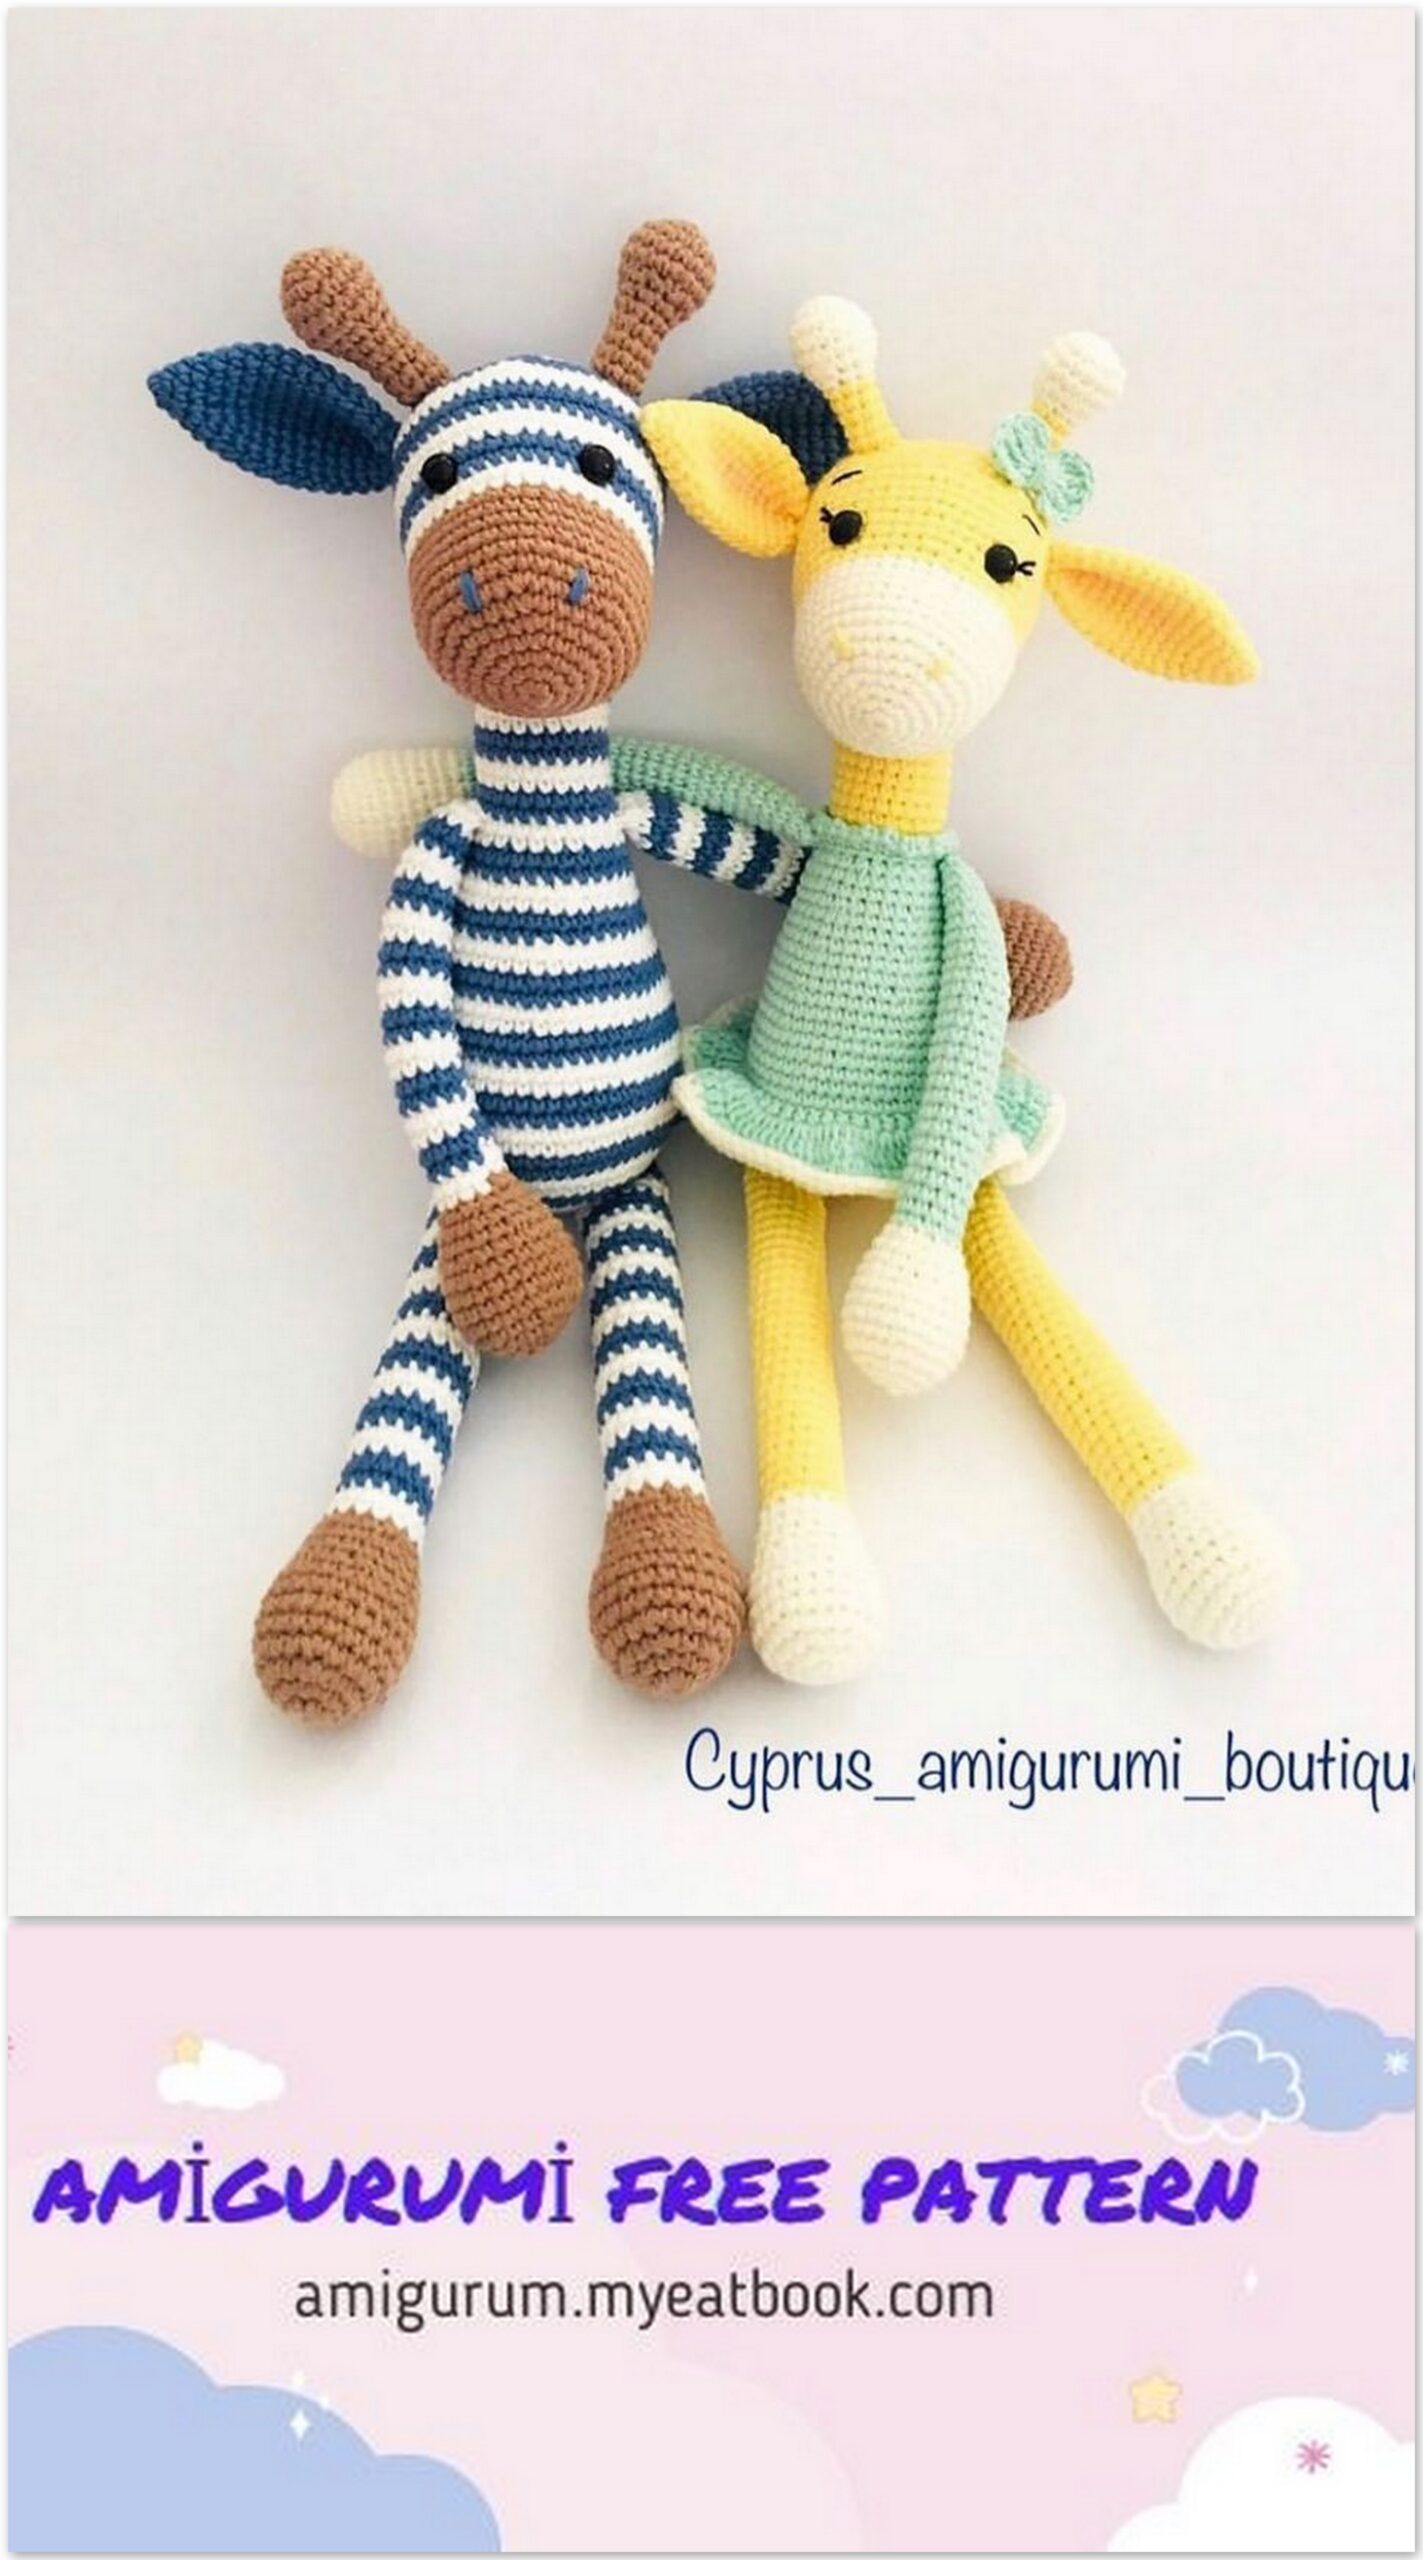
Giraffe flick
The finished size is 43cm.
You will need:
Hook
3.5mm or size suitable for your chosen yarn.
Yarn
Primary color: 100g / 283m, light wool or acrylic.
Chin color: 30g / 85m, light coat or acrylic.
Color of hooves and horn: 30g / 85m, light coat or acrylic.
Knitting density
Knitting density is not important, but in a knitted fabric should not be no holes.
Silk threads for embroidery
One skein of embroidery silk in tone yarn for the chin, for embroidery on the upper eyelids over the eyelashes.
One skein of contrasting embroidery silk for sewing spots and eyes. You should choose a color that is additional contrast to spot color (i.e. orange embroidery silk for brown spots).
Beads
Two 3 mm beads matching the color of the spots.
Translation bysinka738
Eyes
Two safe eyes with a diameter of 30mm.
One pair of fake eyelashes.
Lower eyelid
One sheet of white felt.
For the lower eyelid, cut two circles with a diameter of 35 mm from white felt.
One felt sheet for upper eyelids and spots.
* You can make as many spots as you like.
Other
Little scissors.
Needle for embroidery.
Stitching needle
300g halofiber for filling
TEMPLATES
CONVENTIONS
Ch: air loop
Dec: knit two stitches together with one column
İnc: knit two stitches from one loop of the bottom row
Sc: single crochet
Light
[] repeat the specified number of times indicated in
parentheses sequence
() the number of loops at the end of the row
* repeat the specified sequence as many times as
how much is said after an asterisk
FAQ
Q .: Why do not you indicate the type of yarn?
A .: There are several reasons. Firstly, to achieve a good result, Amigurumi does not need a certain type of yarn; secondly this the project was not sponsored by a yarn manufacturer if you want to know the special characteristics of yarn and other products, used in this project, look at the back of the book.
Final reason: all of you are successful artisans, and have the right choose your favorite brand, fiber content and weight parameters yarn to achieve the desired effect. I would like to see yours work!
W .: This hook is too small for my yarn! I can use
a different size hook?
O, sure! If you knit very tightly, or you use more
thick yarn, a larger hook may be a must.
Use the hook you consider necessary to
achieve the best results for you.
W .: Through the holes in the knitted fabric you can see the filler! How can i do this to prevent?
A .: To prevent the filler from being visible, use the hook a little
smaller than necessary for the yarn of your choice. Besides In addition, fill the details of your amigurumi NOT strongly. For achievement fill the best results tightly, but so as not to stretch knitted fabric.
INSTRUCTION
Important!
This toy knits continuously in a spiral without joining at the end each row. To mark the end of a row, use a slice contrasting colored thread or marker. If you use “thread” marker, throw the tail of the thread through the loop of the row and watch so that the marker thread is not accidentally knitted into the fabric. You are such a marker
You can easily remove it by simply pulling it out.
To make the process of filling your amigurumi easier, Stuff the toy as you knit. Start filling when the part reach a few centimeters in length.
You may have to resort to some
manipulations to ensure that the correct shape is achieved.
Torso
Start knitting from the neck, top to bottom
1 row: Using a 3.5mm hook and primary color yarn, start with 6Sc in the magic ring (6)
2 row: İnc in each loop (12)
3 row: 12Sc for the rear lobes of the loops, ONLY in this row
Note: the front lobes of the loops of this row are used. for sewing the head to the neck.
4 row: 12Sc
5 row: repeat the 4th row (12)
6 row: [İnc, 3Sc] 3 times (15)
7-21 row: 15Sc
22 row: [İnc] 3 times, 12Sc (18)
23 row: [1Sc, 3Sc in the next loop] 3 times, 12Sc (24)
24 row: [3Sc, 3Sc in the next loop] 3 times, 12Sc (30)
25 row: [5Sc, 3Sc in the next loop] 3 times, 12Sc (36)
26 row: [7Sc, 3Sc in the next loop] 3 times, 12Sc (42)
27 row: [9Sc, 3Sc in the next loop] 3 times, 12Sc (48)
28 row: [11Sc, 3Sc in the next loop] 3 times, 12Sc (54)
29 row: [13Sc, 3Sc in the next loop] 3 times, 12Sc (60)
30 row: [15Sc, 3Sc in the next loop] 3 times, 12Sc (66)
31 row: [17Sc, 3Sc in the next loop] 3 times, 12Sc (72)
32 row: [19Sc, 3Sc in the next loop] 3 times, 12Sc (78)
33 row: [21Sc, 3Sc in the next loop] 3 times, 12Sc (84 )
34-37 row: 84Sc
Now without trimming the yarn, we will continue
press knit belly.
Stomach
1 row: [skip 18 loops, 3Sc] 4 times (12)
2 row: We knit only those loops that are made on the previous
row: [Dec] 6 times (6)
Fasten the thread, tighten the hole tightly, hide the tail of the thread.
Legs
Each leg is connected individually on 18 skipped loops from
previous section. Start each leg, securing your core
yarn connecting column in the missed loop, the most
close to the abdomen section.
You will get four small holes near the abdomen, which then
will need to be sewn with several stitches of yarn. Leave at at least one tail of yarn about 20 cm long at the beginning of any leg to sew these holes. DO NOT fill your legs until all four are connected.
1 row: Fasten the yarn into the first skipped loop of the previous
sections, 1Sc in the same loop, 17Sc (18)
2-19 row: 18Sc
20 row: [İnc, 5Sc] 3 times (21)
21-22 row: 21Sc
23 row: [İnc, 6Sc] 3 times (24)
24-25 row: 24Sc
26 row: [İnc, 7Sc] 3 times (27)
27-28 row: 27Sc
29 row: [İnc, 8Sc] 3 times (30)
30-31 row: 30Sc
32 row: [İnc, 9Sc] 3 times (33)
33-34 row: 33Sc
35 row: [İnc, 10Sc] 3 times, on the last loop change
hoof-colored yarn (36)
36-40 row: 36Sc
Fasten the thread, leave the thread about 20cm for sewing.
After all four legs are connected, tightly fill the legs.
Then we start separately knitting the soles of Flick’s feet.
Hooves
(4 parts)
1 row: We start knitting with hoof the color of the hooves of the horns, 6Sc in the ring amigurumi (6)
2 row: İnc in each loop (12)
3 row: [İnc, 1Sc] 6 times (18)
4th row: [İnc, 2Sc] 6 times (24)
5 row: [İnc, 3Sc] 6 times (30)
6 row: [İnc, 4Sc] 6 times (36)
Fasten the thread. Using a tail of yarn from one leg, with a chain stitch
sew the sole to the foot, adding a little if necessary
filler before the soles are completely sewn.
Sew the rest of the hooves in the same way.
Tail
Cut three pieces of yarn in the color of hooves and horns, approximately 10cm
and set aside.
From the yarn of the main color, tie a string u, about 5 cm, when your tail
reaches the desired length, leave all 3 loops on your hook.
Take the deferred three pieces of yarn, bend them in half,
pull through all 3 loops on your hook until you have
triple bound loop large enough to form
end loops
Using a brush or comb, fluff the tail.
Sew the tail to the back of the body, approximately 3 rows
above the start of the legs
Eyelid
(2 parts)
Make a small hole in the center of the white felt circle (for
legs of the safe eye).
Take the semicircles of the upper eyelids, the white circles of the lower eyelids and the threads for
embroidery. Using two stretches of thread of the color of the chin, sew
eyelash to the flat side of the upper eyelid, possibly making
punctures between each cilium.
Fold the white circle of the lower eyelid and the upper eyelid in pairs (with
eyelashes), sew both parts with a sewing seam (ONLY the main
section!). Then thread a contrasting color overcast with a seam
along the lower half of the lower eyelid, making it as uniform as possible
stitches
Head
Now we knit the head, we start from the chin, we knit continuous
spiral rows. We fill in the process of knitting.
1 row: Yarn-colored chin dial 13Ch, 1Sc into the second from
hook loop, 9Sc, 3Sc in the last loop. Continue
knit on the opposite side of the chain: 10Sc, 3Sc in
last loop (26)
2 row: [10Sc, İnc 3 times] twice (32)
3 row: * 10Sc, [İnc, 1Sc] 3 times; repeat from * again (38)
4th row: * 10Sc, [İnc, 2Sc] 3 times; repeat from * again (44)
5 row: * 10Sc, [İnc, 3Sc] 3 times; repeat from * again (50)
6 row: * 10Sc, [İnc, 4Sc] 3 times, repeat from * again (56)
7-9 row: 56Sc, in the last loop of the 9th row, change the thread to
primary color (56)
10 row: 56Sc
11 row: 20Sc, Dec, 26Sc, Dec, 6Sc (54)
12 row: 54Sc
13 row: * 13Sc, Dec, [4Sc, Dec] twice; repeat from * again
(48)
14-18 row: 48Sc
On the side opposite to the transition to a new yarn color (i.e.
middle of the row), between the 17th and 18th rows of the head, at a distance
about 4 loops apart, insert safe eyes.
19 row: [Dec, 6Sc] 6 times (42)
20-21 row: 42Sc
22 row: [Dec, 5Sc] 6 times (36)
23-24 row: 36Sc
25 row: [Dec, 4Sc] 6 times (30)
26-27 row: 30Sc
25 row: [Dec, 3Sc] 6 times (24)
Do not fasten the thread!
Make sure your eyes are set securely with a few stitches
sew the eye to the knit fabric. To the outside corner
Sew a bead to each eye.
Horns
Now we will knit horns. Knit three offset loops to
horns turned out in the center of the head, but did not shift to the side
backs. Set the start row marker.
First horn
1 row: 3Sc, skip 12 pete
e remaining 9Sc (12)
2-5 row: 12Sc (ignoring missing loops – they are reserved
for the second horn), on the last loop of the fifth row, change
thread on yarn of the color of hooves and horns (12)
6 row: [İnc, 1Sc] 6 times (18)
7-8 row: 18Sc
9 row: [Dec, 1Sc] 6 times (12)
10 row: [Dec] 6 times (6)
Fasten the thread, tighten the hole tightly. Fill in the process
knitting.
Second horn
1 row: Fasten the thread using the connecting post
primary color into the first skipped loop of the first row
first horn, 1Sc in the same loop, 11Sc (12)
2-5 row: 12Sc
6 row: [İnc, 1Sc] 6 times (18)
7-8 row: 18Sc
9 row: [Dec, 1Sc] 6 times (12)
10 row: [Dec] 6 times (6)
Fasten the thread, tighten the hole tightly. Fill in the process
knitting.
The ears
(2 parts)
We knit in continuous spiral rows.
Ears DO NOT stuff.
1 row: We start with the main color yarn, 6Sc in the amigurumi ring
(6)
2 row: [İnc, 1Sc] 3 times (9)
3 row: 9Sc
4th row: [İnc, 2Sc] 3 times (12)
5 row: İnc, 10Sc, İnc (14)
6 row: İnc, 12Sc, İnc (16)
7 row: İnc, 14Sc, İnc (18)
Translation bysinka738
8 row: İnc, 16Sc, İnc (20)
9 row: İnc, 18Sc, İnc (22)
10 row: İnc, 20Sc, İnc (24)
11 row: [Dec, 2Sc] 6 times (18)
12-13 row: 18Sc
Fasten the thread, cut, leaving a tail of about 20cm for
Sewing ears to the head. Ears DO NOT stuff.
Fold the ear along so that the beginning of the row markers are on the fold
of each ear. Position the ears on the head so that the markers are
near the top of the head.
Sew the ears about two rows below the start of the horny
sections and slightly inclined to the back of the head.
Assembly and design
It remains to do quite a bit. All you have to do now is
sew head to neck and sew stains! Align the neck with the occipital
side of the head. Use the left half loops on the neck
as the direction of the seam, sew the head around these loops.
Using pins, randomly place spots on Flick’s body,
neck and legs.
If you are happy with your stain placement, overcast seam
sew them onto your giraffe, piercing through the knitted fabric and
Firth at the same time.
For the nose, embroider two crosses along the line of color change,
directly below the eyes and slightly to the center of the face.
Congratulations on your newborn!
Did you know?
Giraffe is the tallest mammal that lives on Earth!
There are 9 subspecies of giraffe that are recognizable by color and

the structure of their spots!